Setting Up Proxy in Google Chrome
Google Chrome browser lacks built-in proxy functionality. Chrome uses system proxy settings but also supports extensions for proxy management.
Setting Up Proxy in Google Chrome via Windows OS
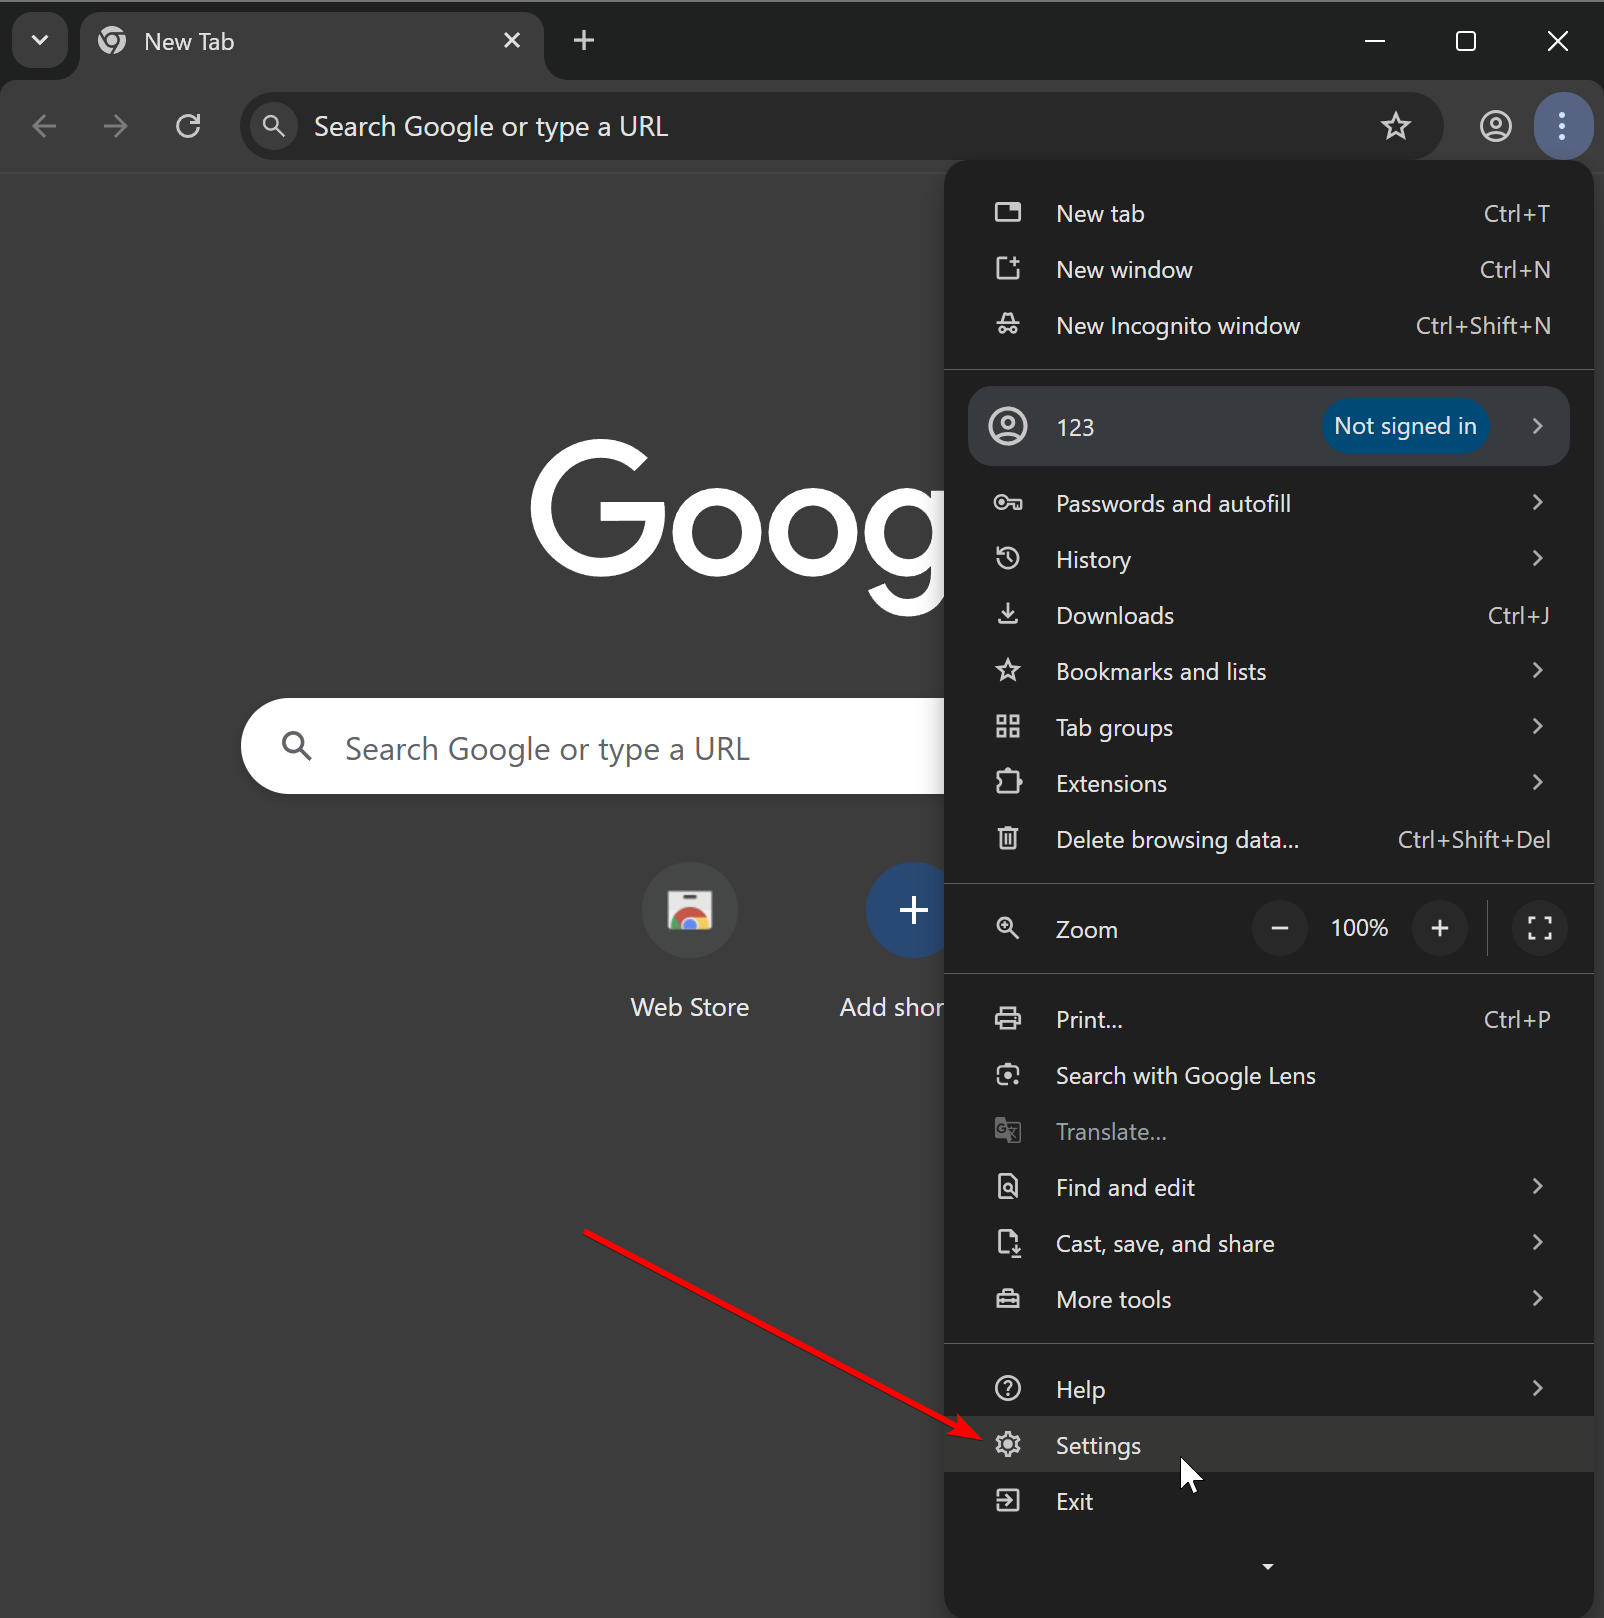
Click the burger menu in Chrome and scroll the dropdown to the bottom to «⚙️ Settings».
Click «System» on the sidebar and navigate to «Open your computer’s proxy settings» (chrome://settings/system).
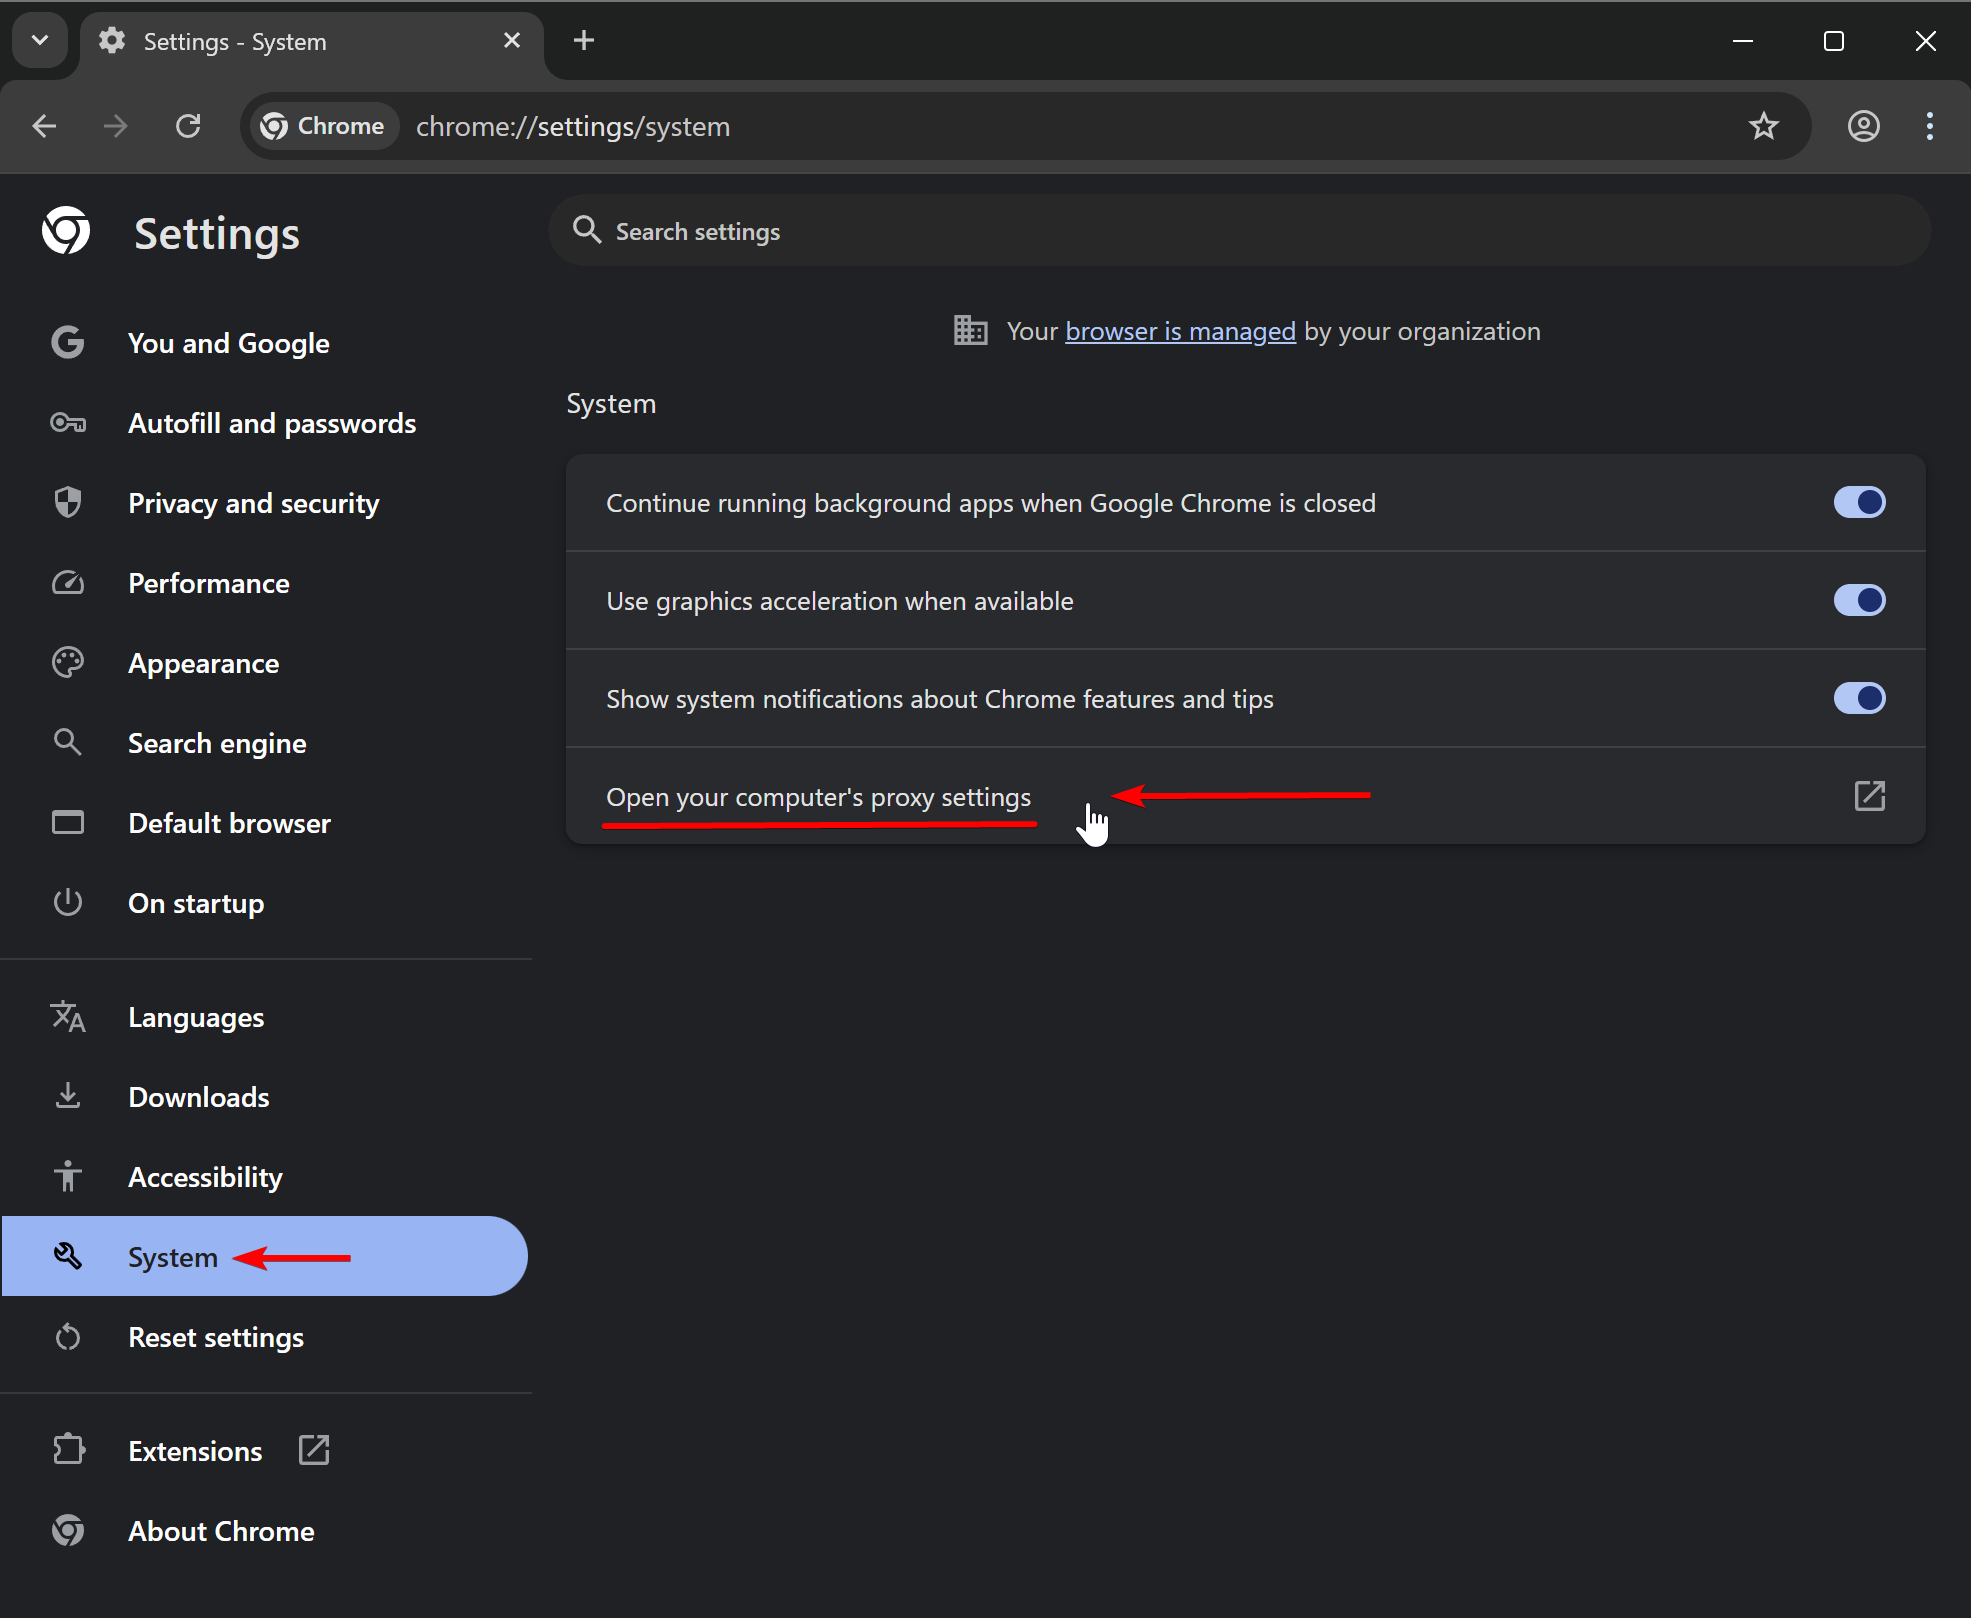
This will open Windows system proxy settings since Chrome has no independent proxy setup mechanism. This means proxy settings applied to the OS will affect all system applications, not just Chrome.
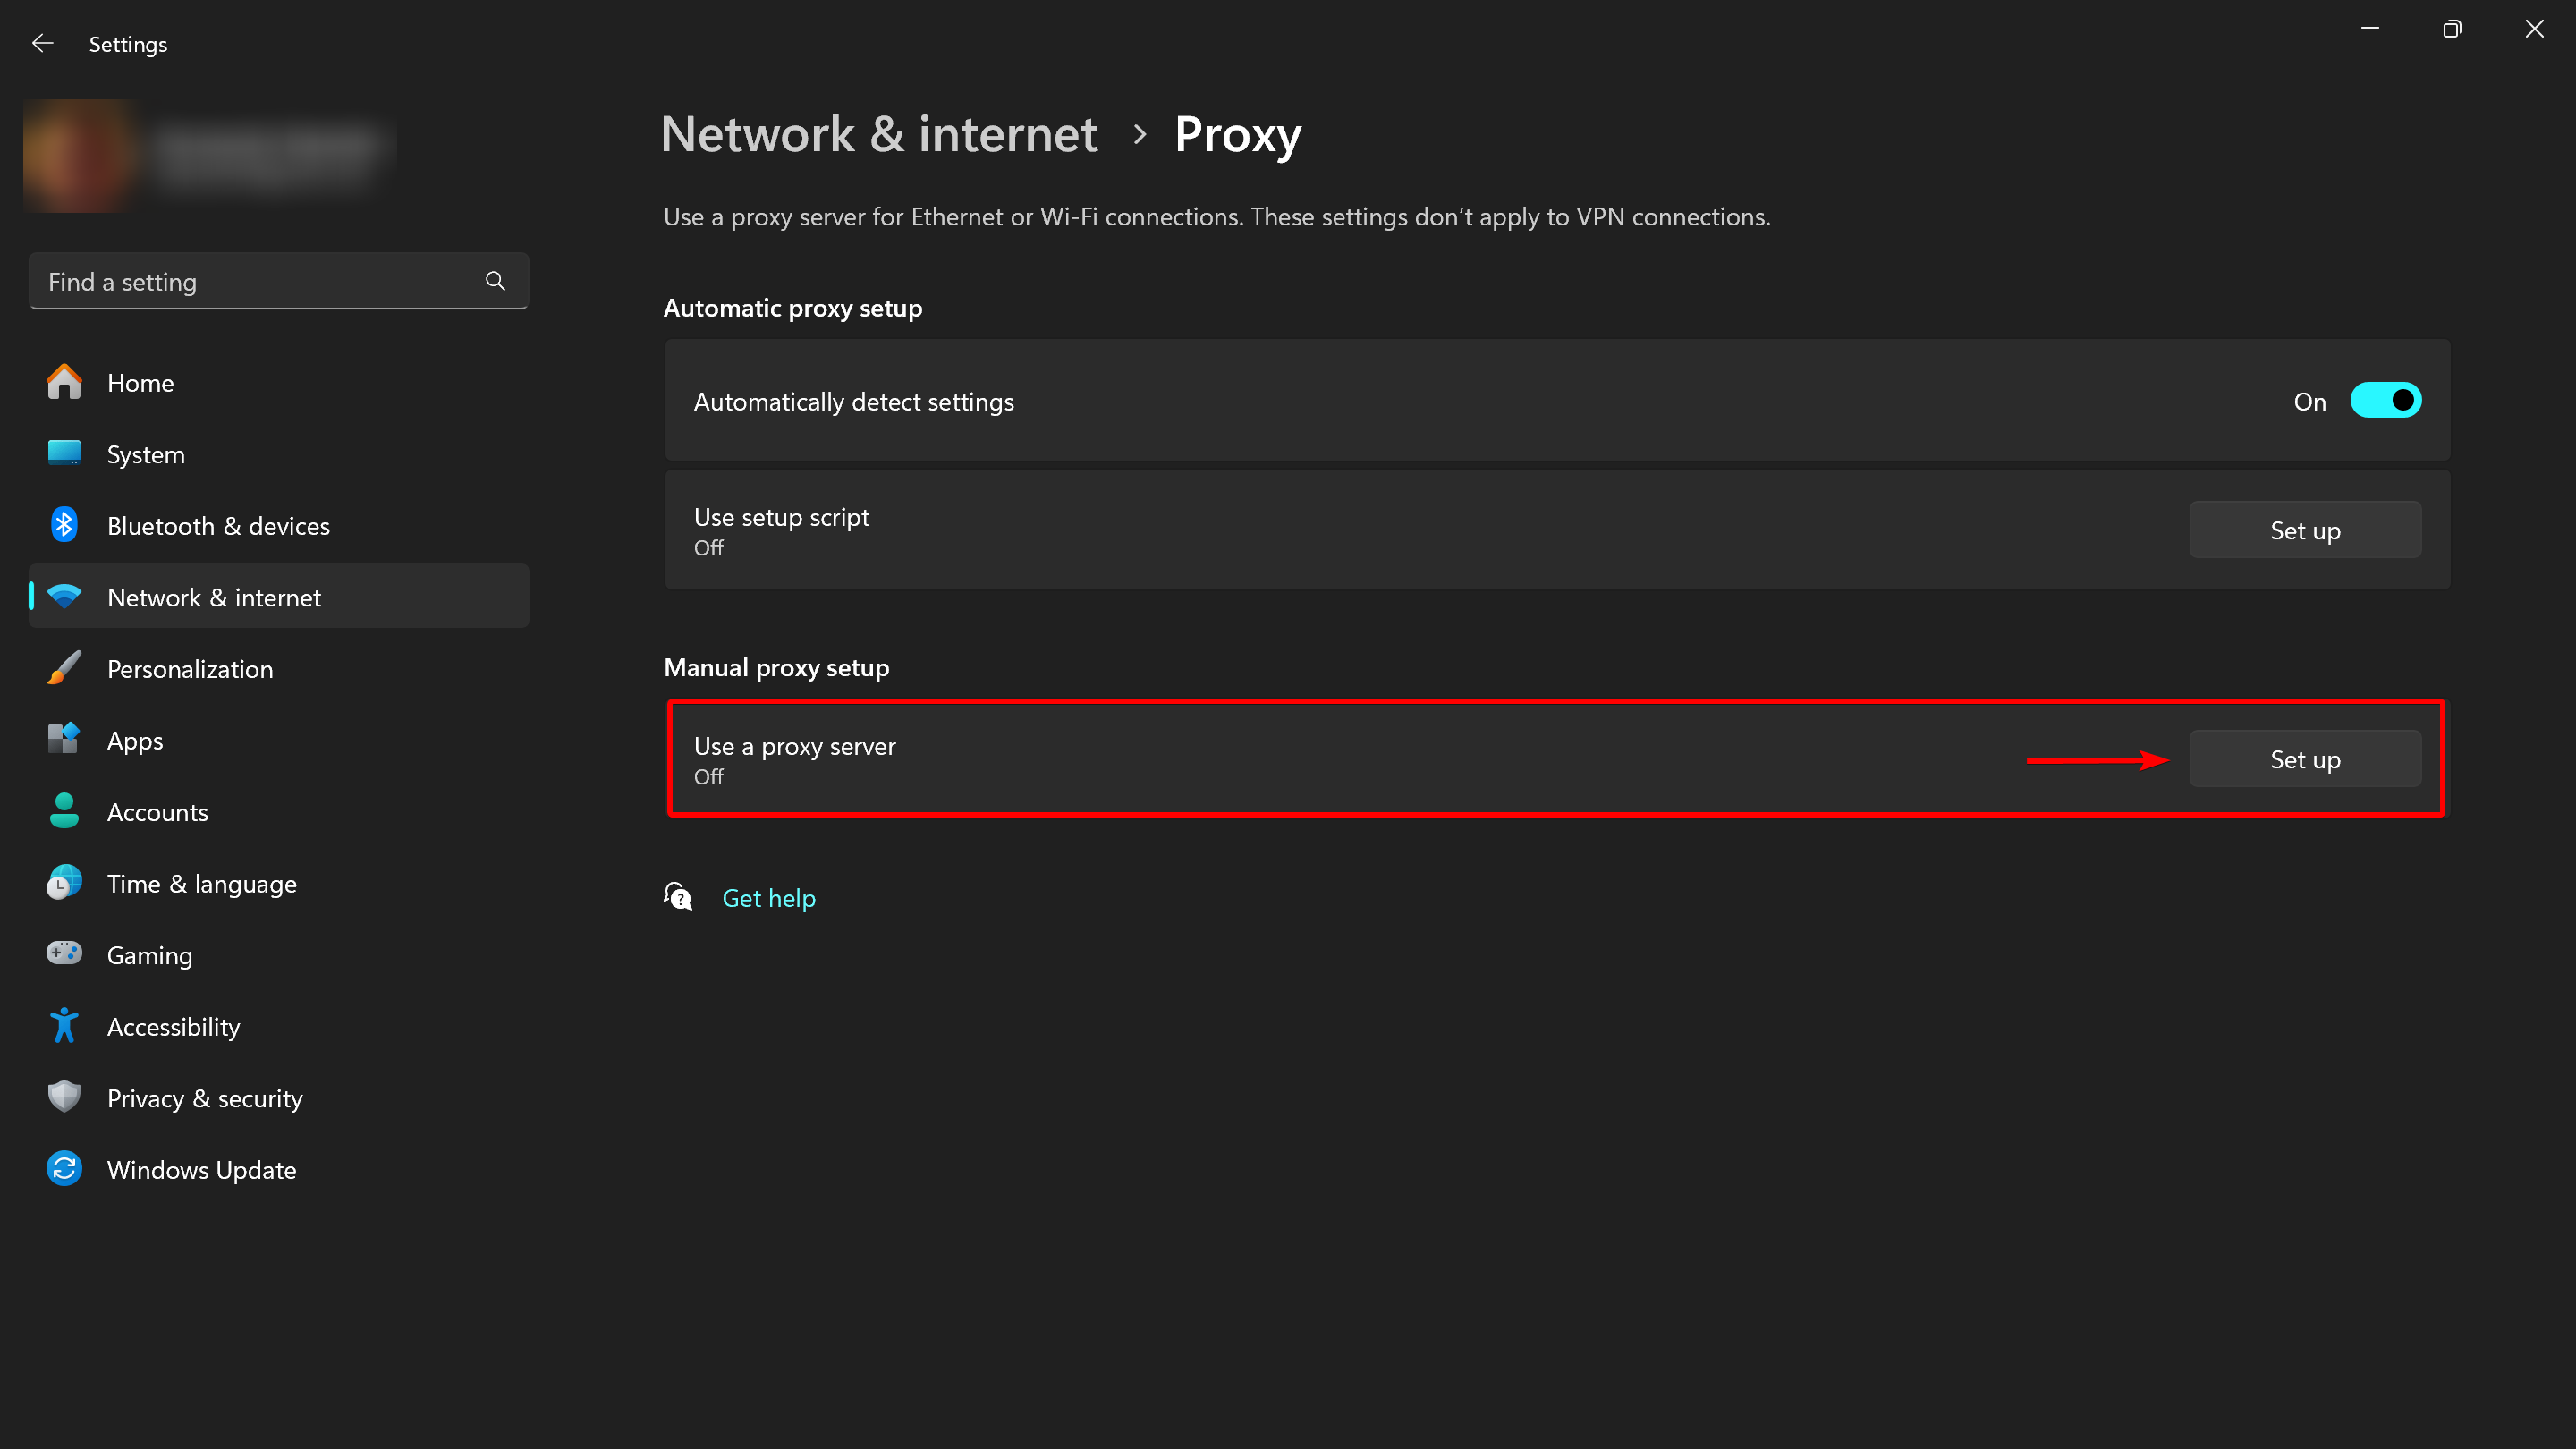
Select the manual proxy setup subsection. You should already have a proxy server and access credentials to enter in the form. If you don’t have a proxy yet, you’ll need to purchase one.
Fill in your proxy server settings:
- «Proxy IP address» - e.g., proxy.example.com or 192.168.1.1;
- «Port» - typically 4 or 5 digits;
- Proxy username/password will be requested later when opening any site/app (absent in this example);
- «Use the proxy server except …» — specify sites to exclude, separated by semicolons (;);
- «Don’t use the proxy server for local (intranet) addresses» — disable proxy for local connections.
Click «Save». If your proxy is IP-bound and requires no username/password, setup is complete.

Read the detailed guide on connecting proxy on Windows OS.
Setting Up Proxy in Chrome via Extensions
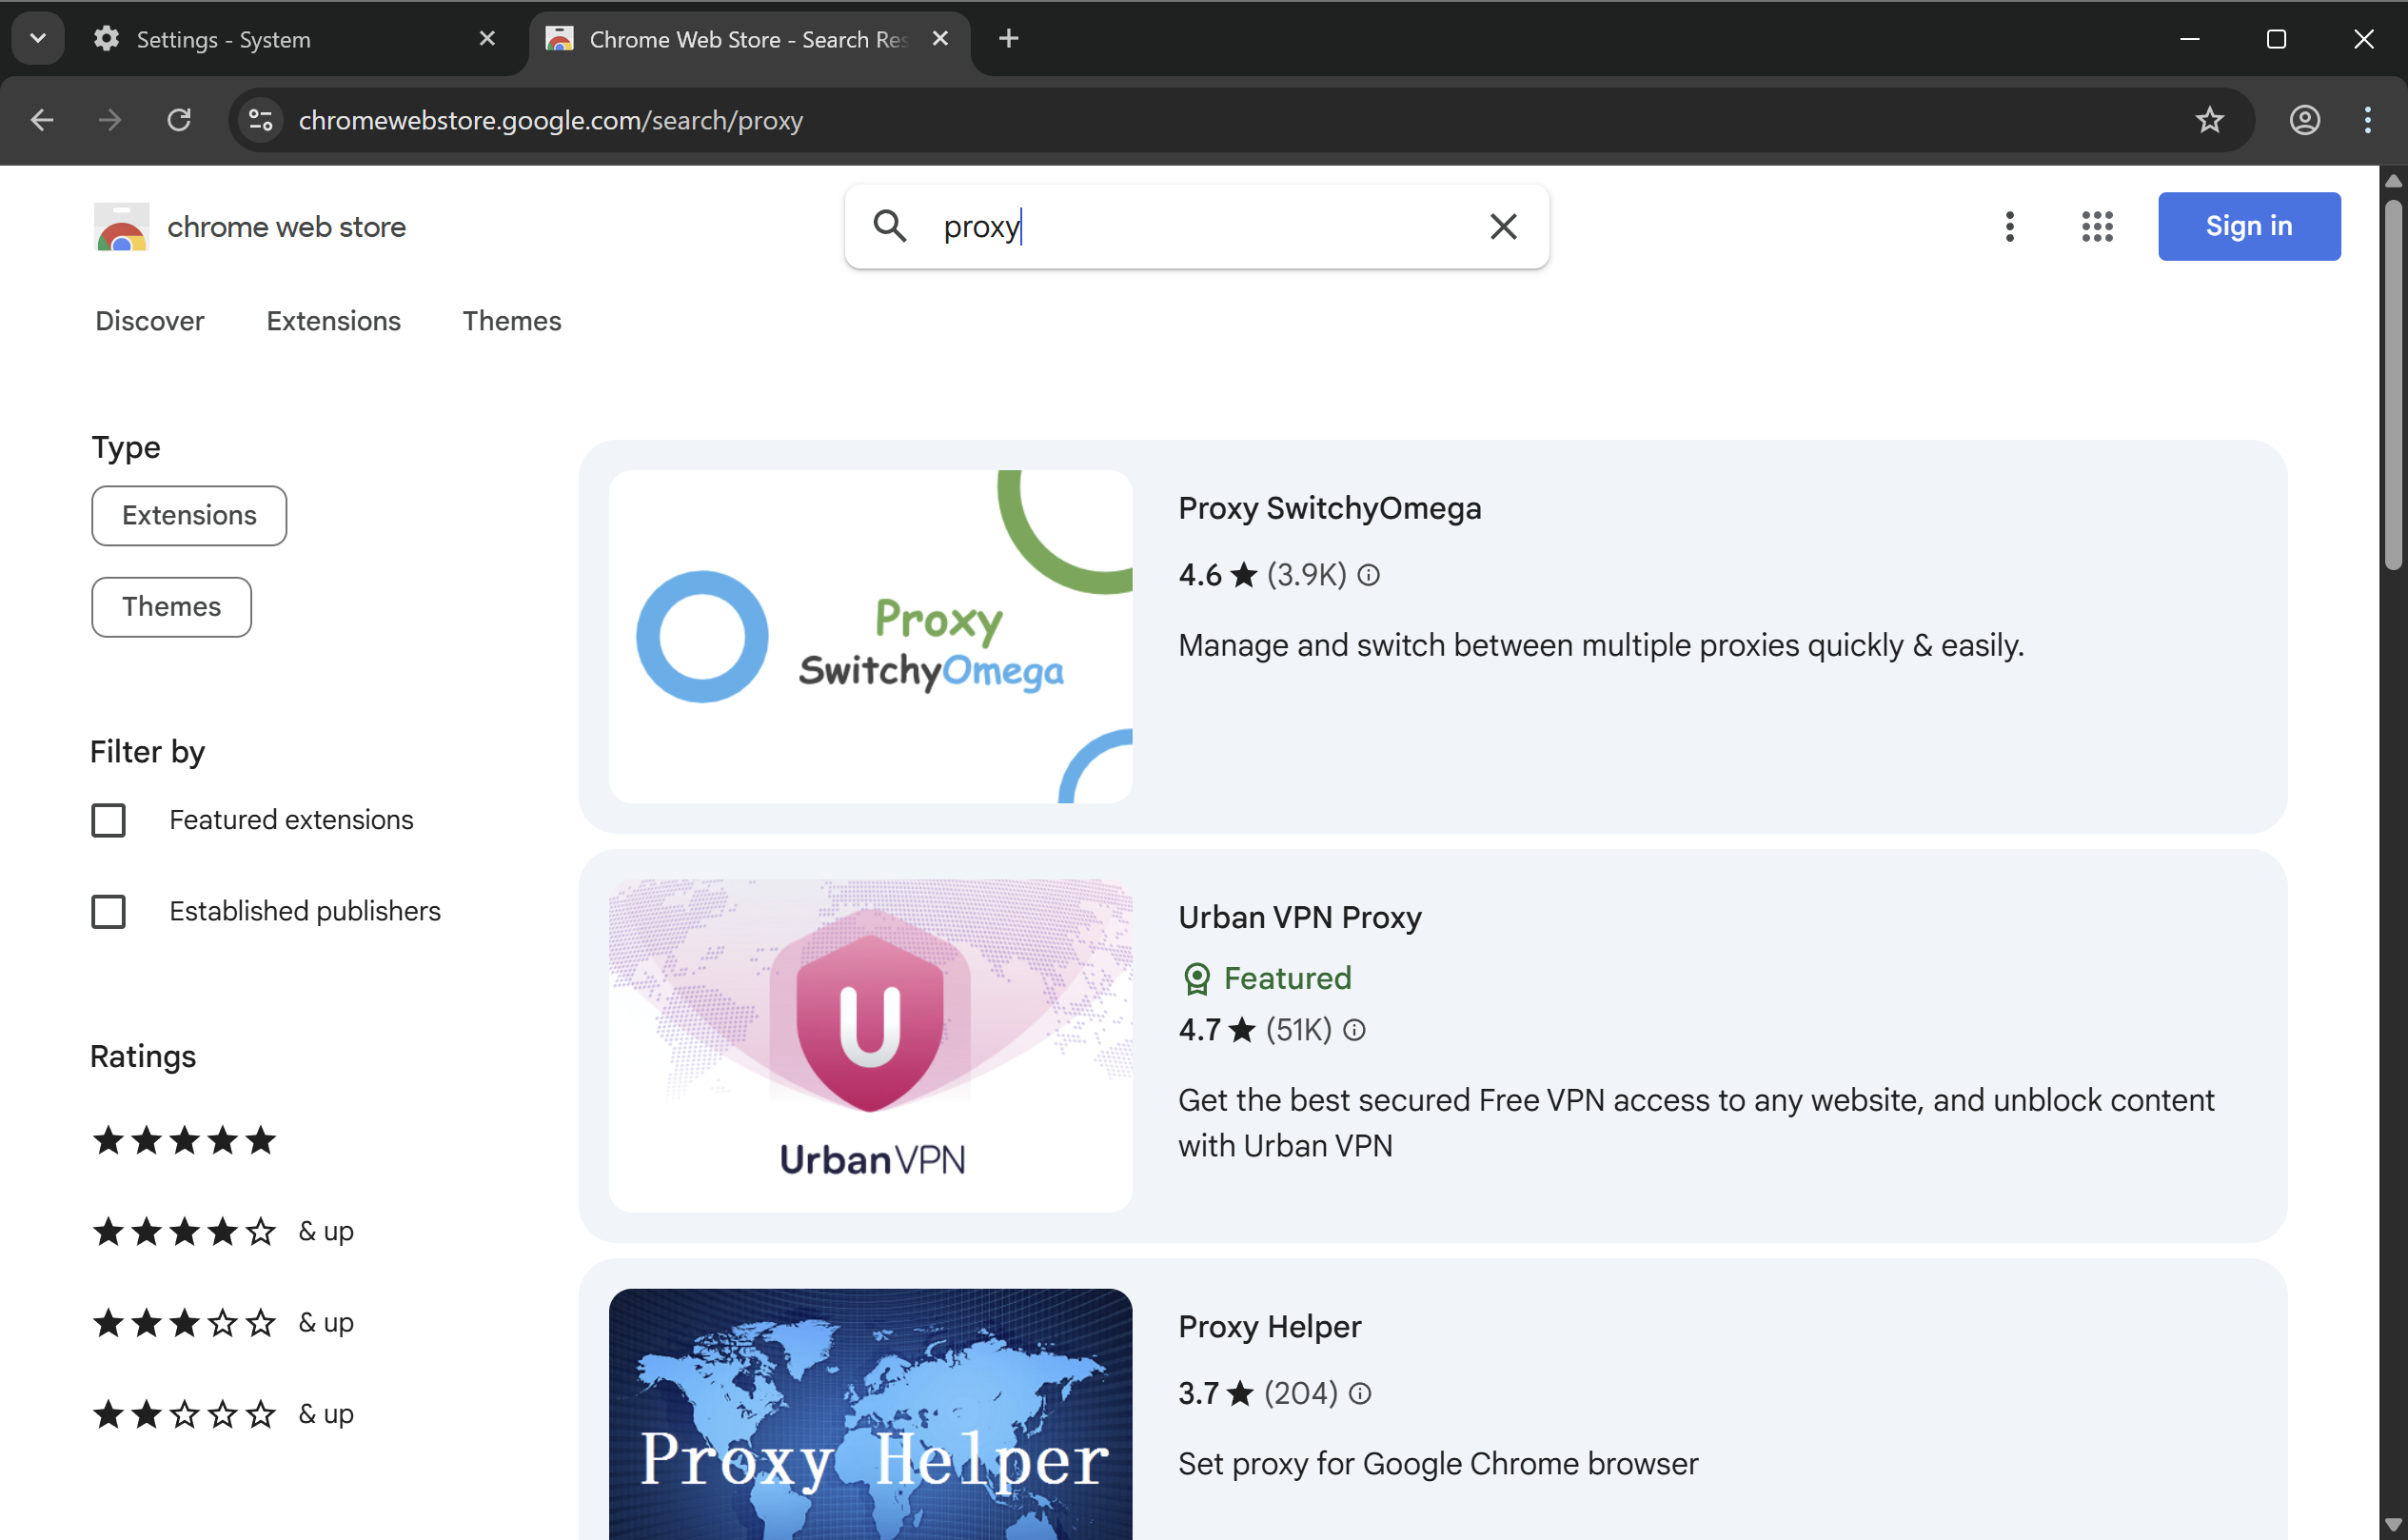
If OS-level setup (Windows or macOS) isn’t suitable, use extensions. Open Chrome Web Store and search «proxy» — dozens of options will appear. Choose based on ratings and reviews.
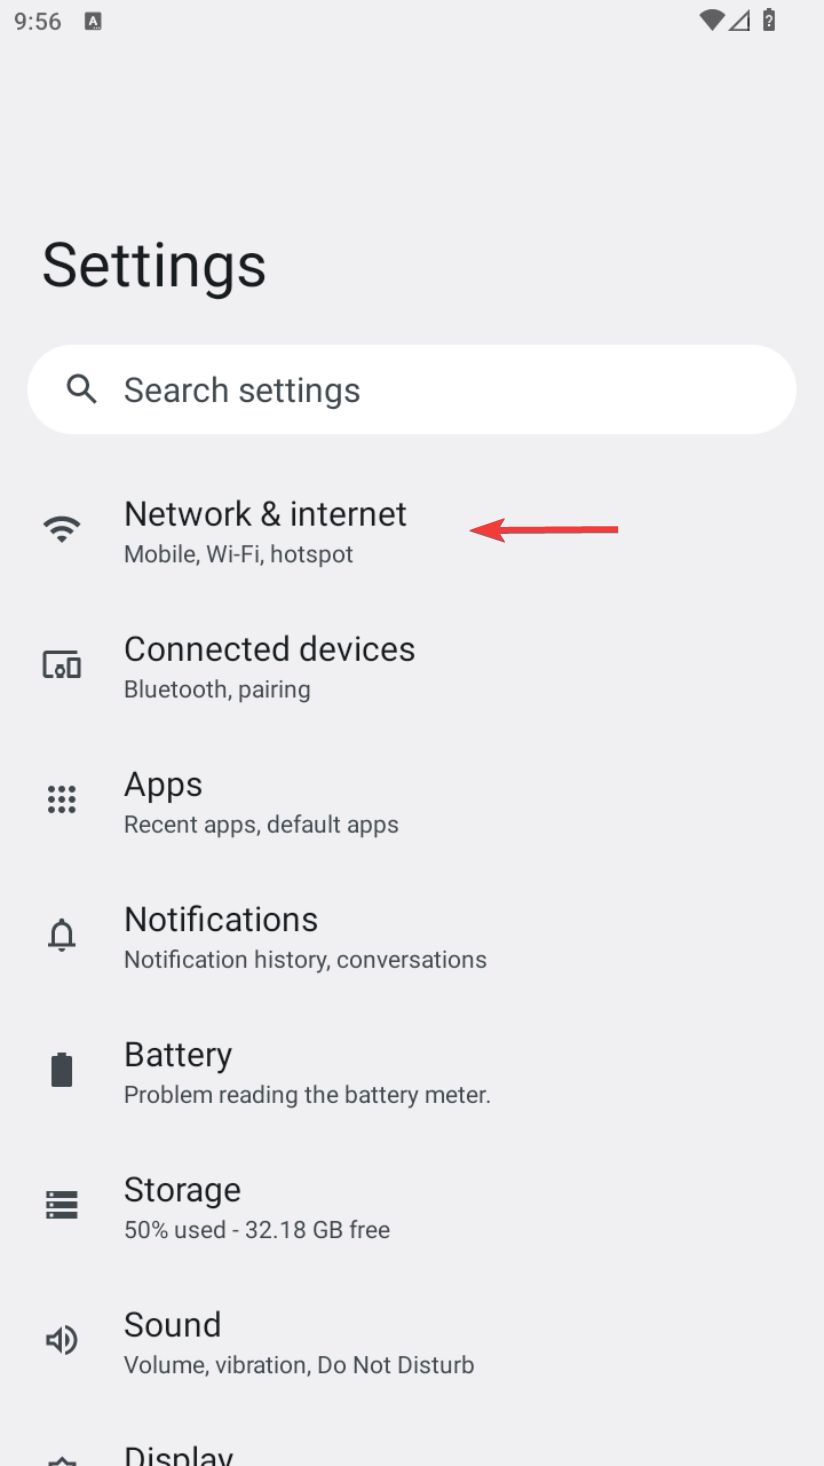
Setting Up Proxy in Google Chrome on Android
For Chrome proxy setup on Android, use the system method. Go to Settings and select «Network & Internet».
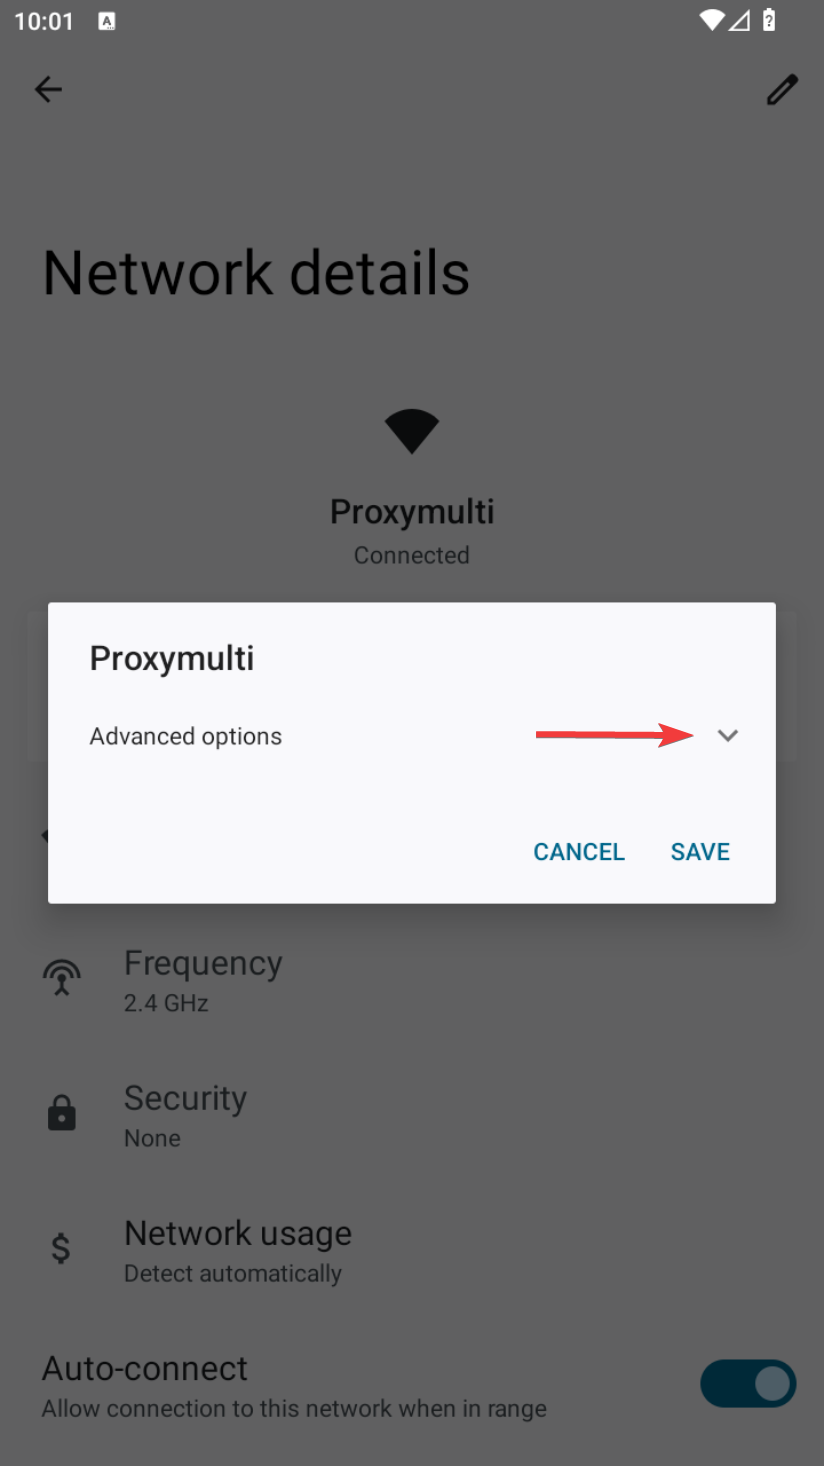
Navigate to the Wi-Fi networks subsection.
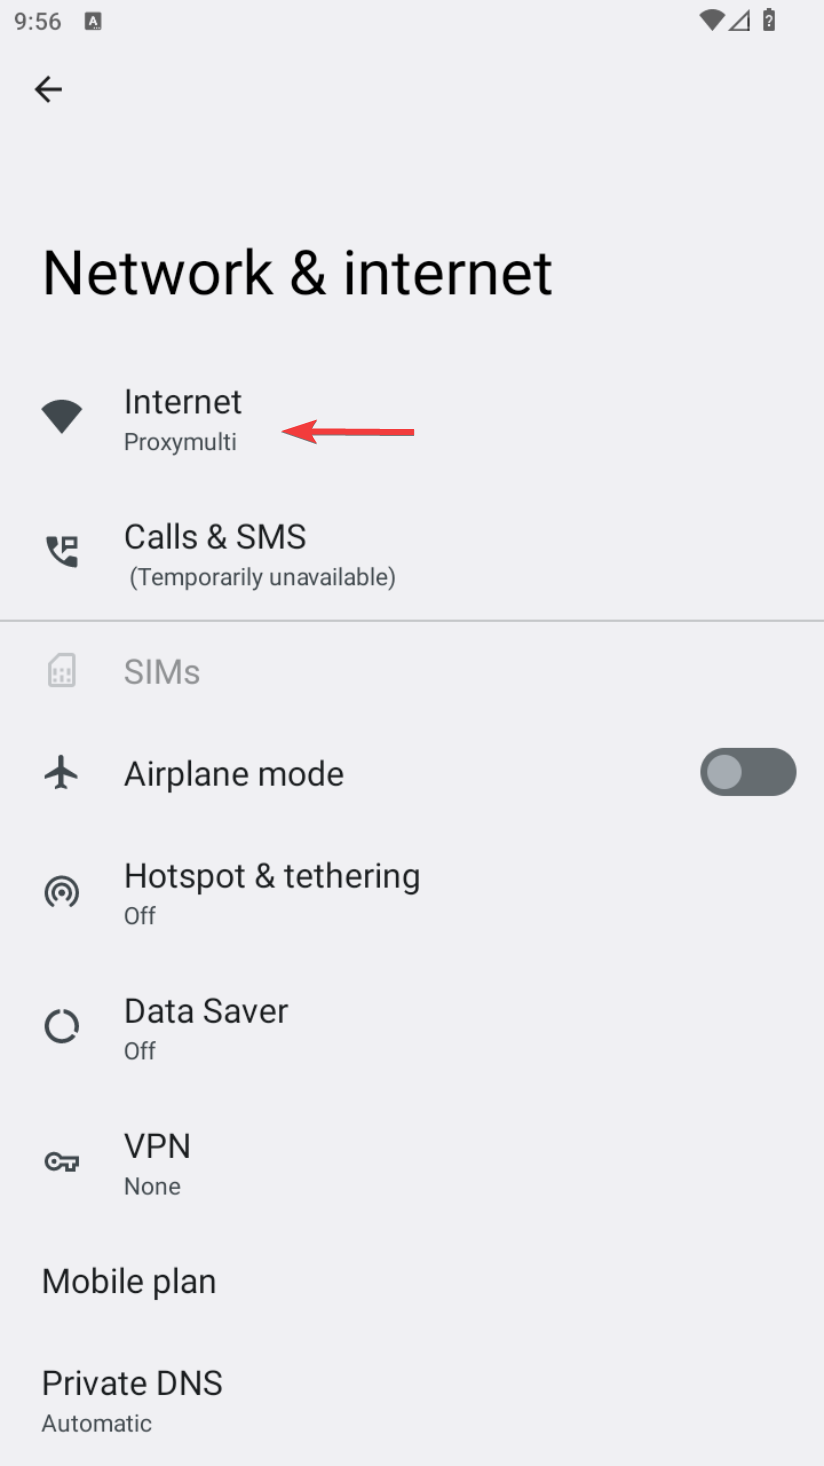
Connect to a Wi-Fi network and tap the ⚙️ icon next to it.
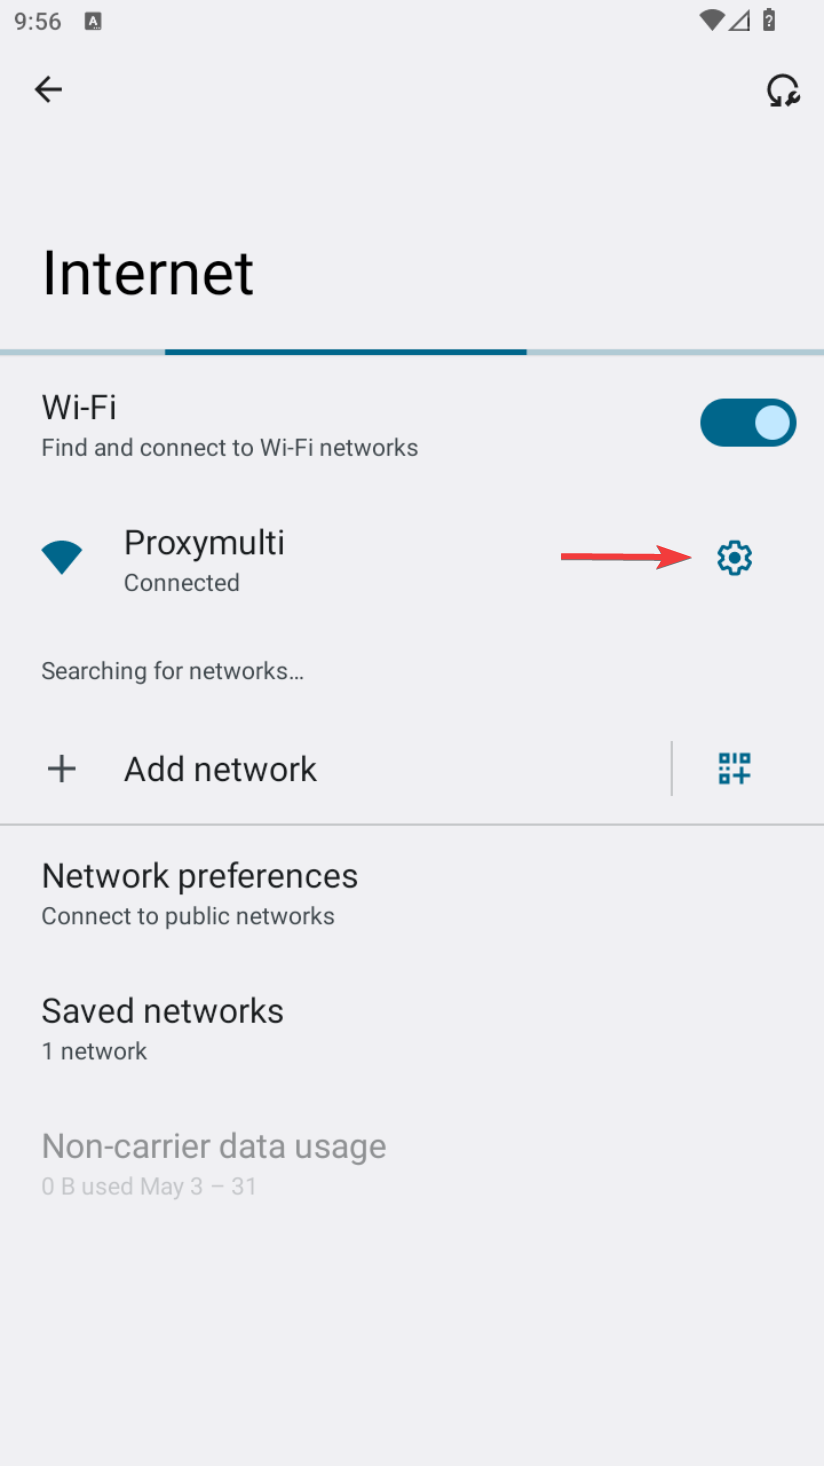
In the network settings window, find the edit button in the top-right corner.
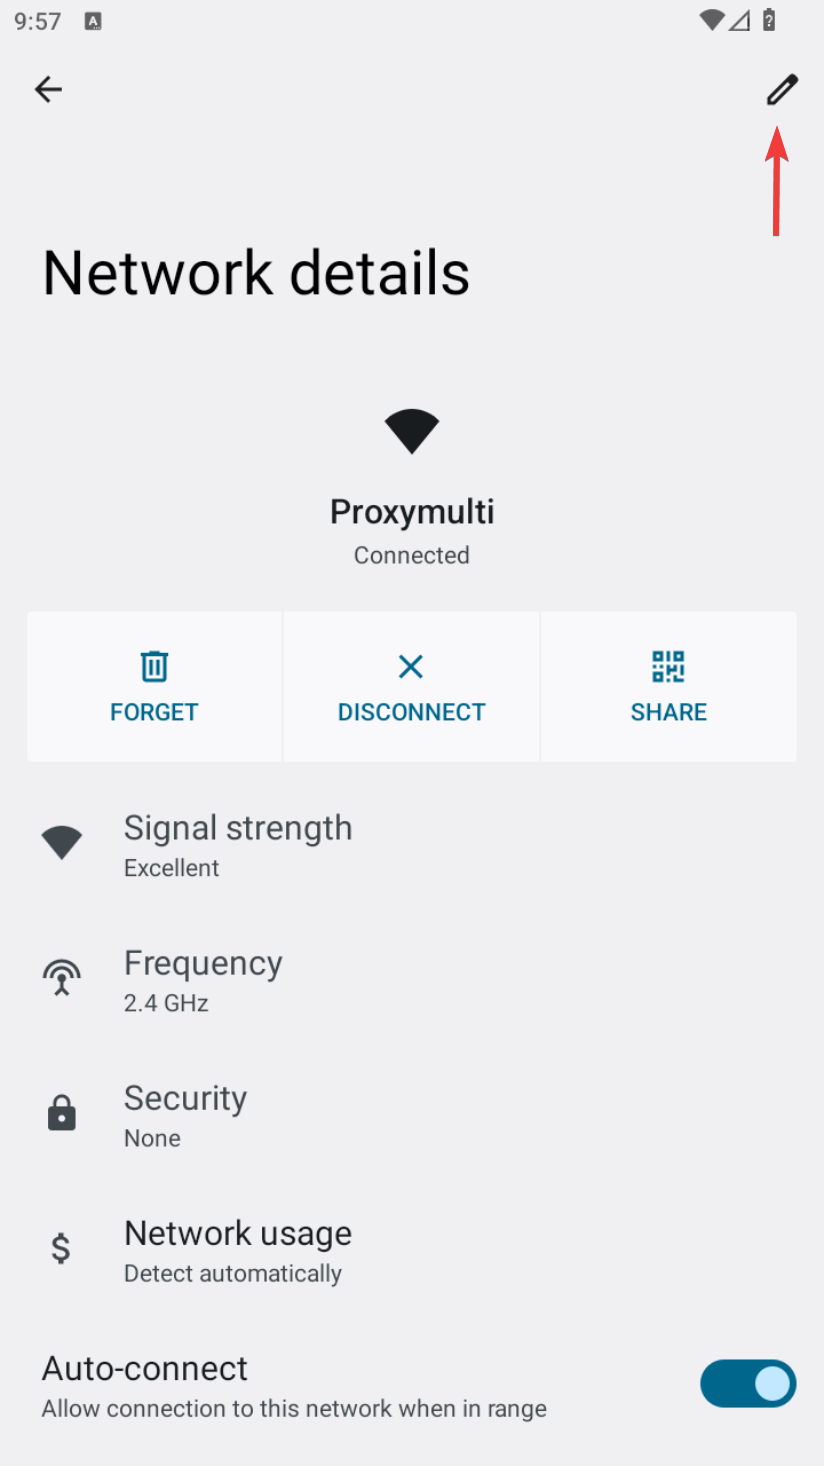
Expand the advanced settings dropdown.
Select «Manual» — a form with fields will appear.
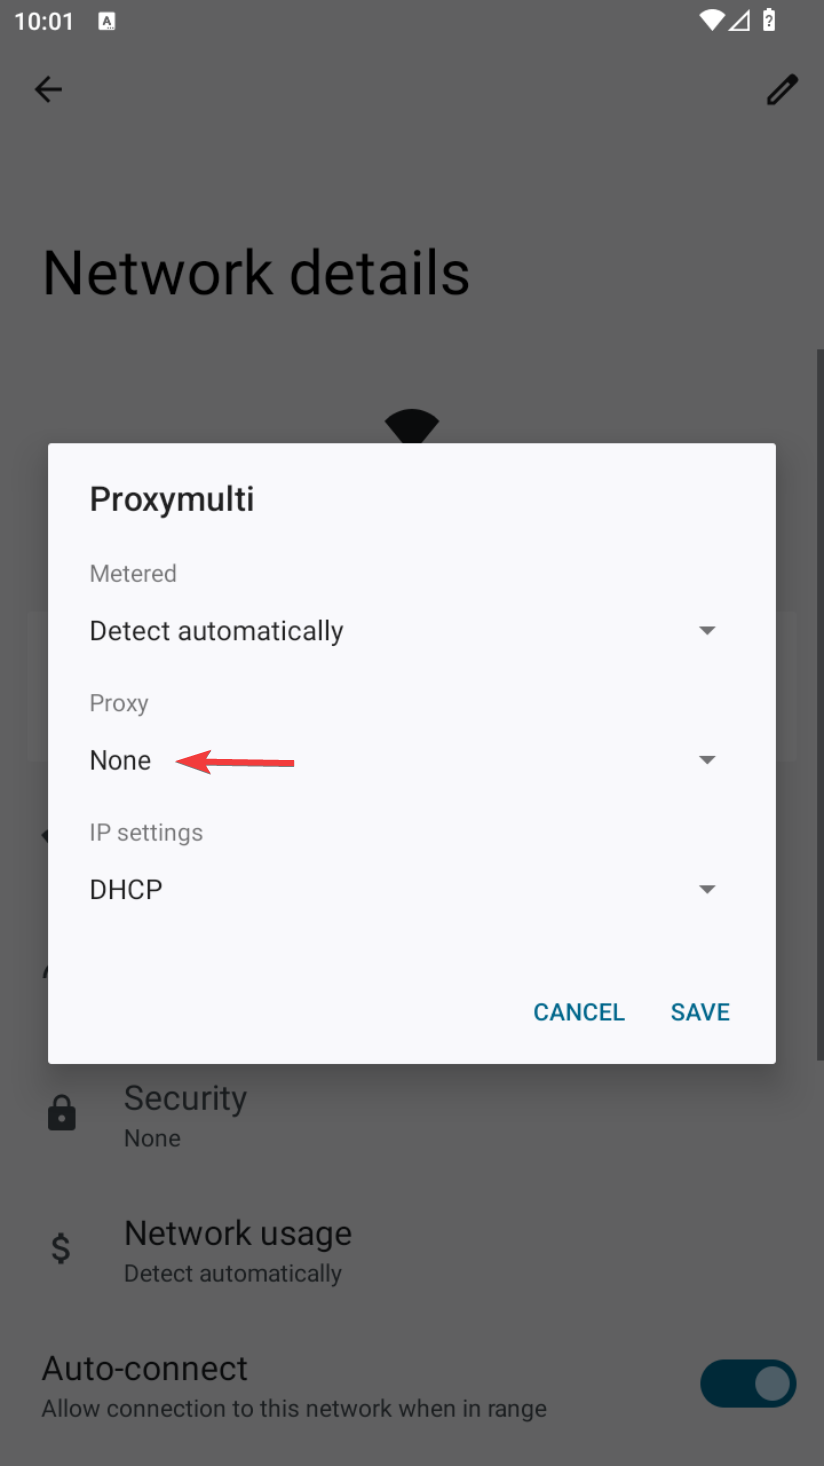
You should already have a proxy server and credentials. If not, purchase one.
Enter proxy connection settings:
- «Proxy hostname» - e.g., proxy.example.com or 192.168.1.1;
- «Proxy port» - typically 4 or 5 digits;
- Username/password will be requested later (absent in this example);
- «Bypass proxy for» — specify sites to exclude, separated by commas.
Click «Save». If your proxy is IP-bound and requires no credentials, setup is complete.
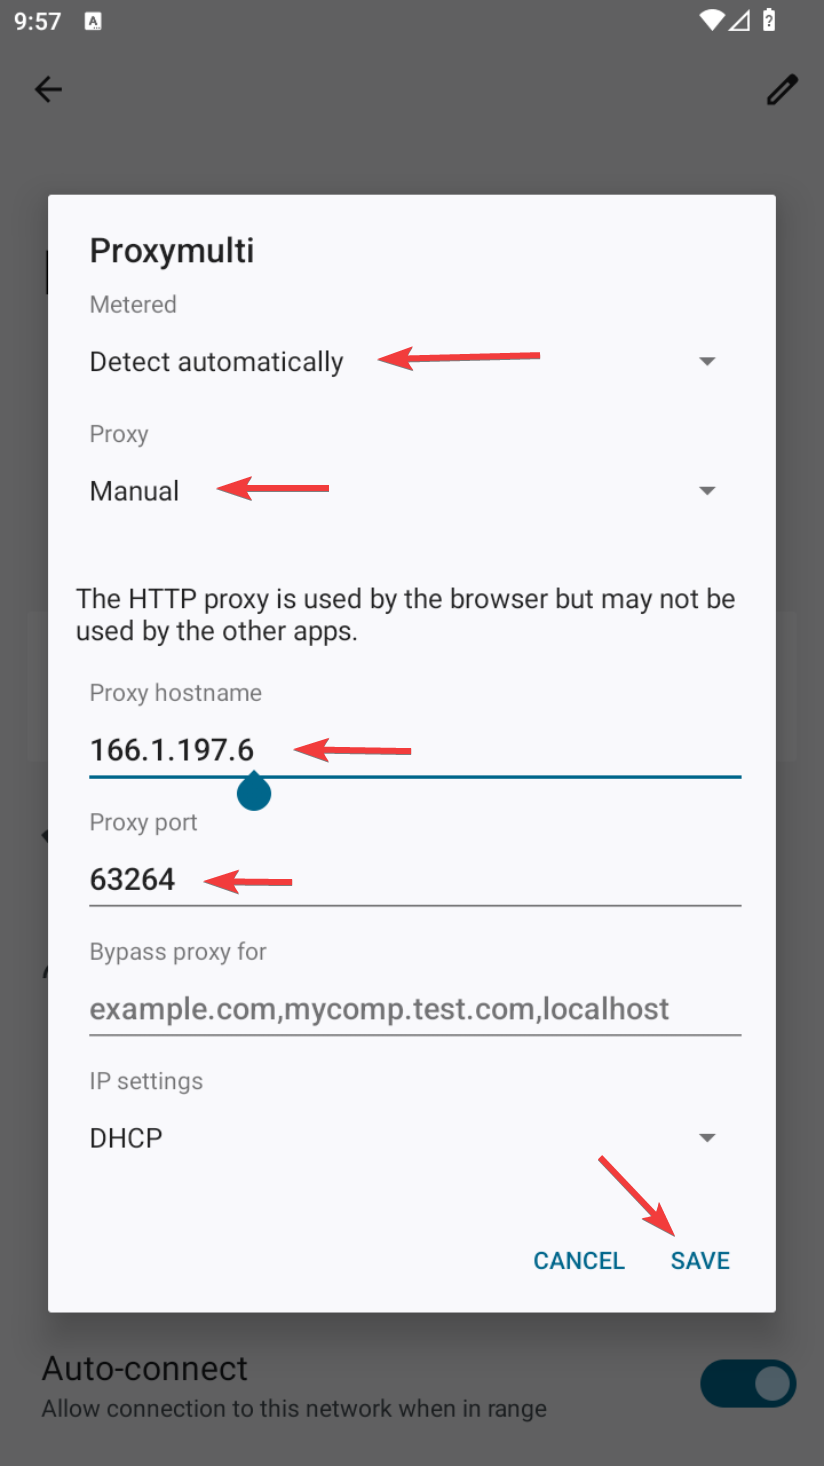
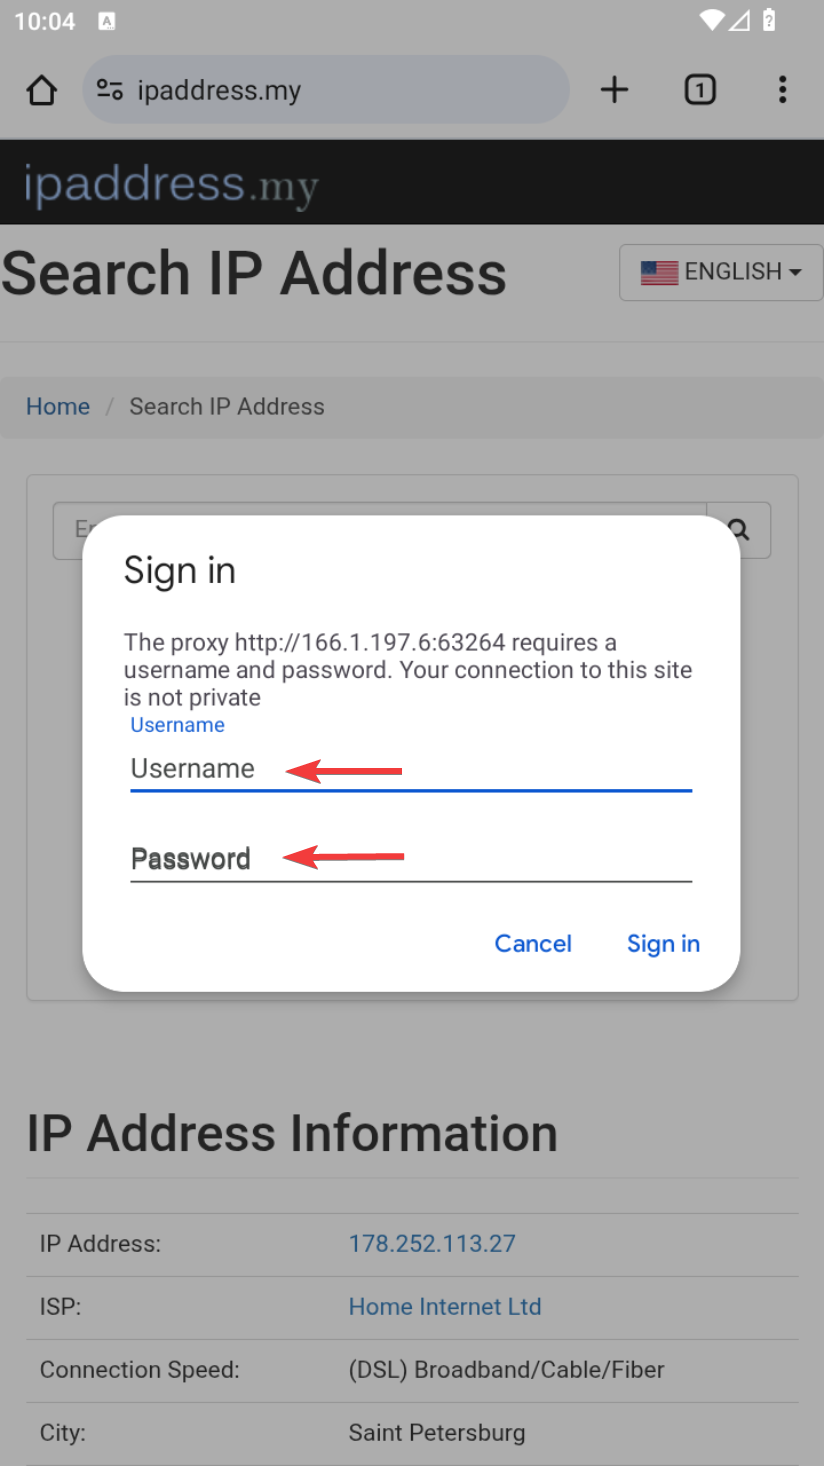
If your proxy requires authentication, Chrome will request credentials when opening any site.
Setting Up Proxy in Google Chrome on iPhone
For Chrome proxy setup on iOS, use the system method. Go to Settings and select «Wi-Fi».
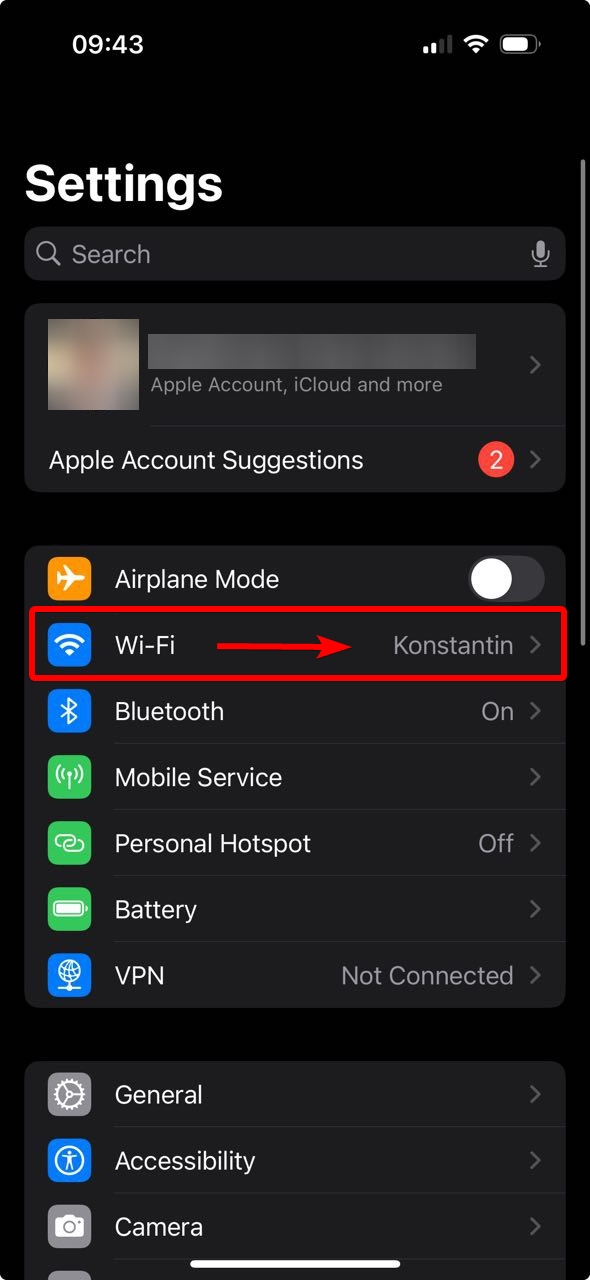
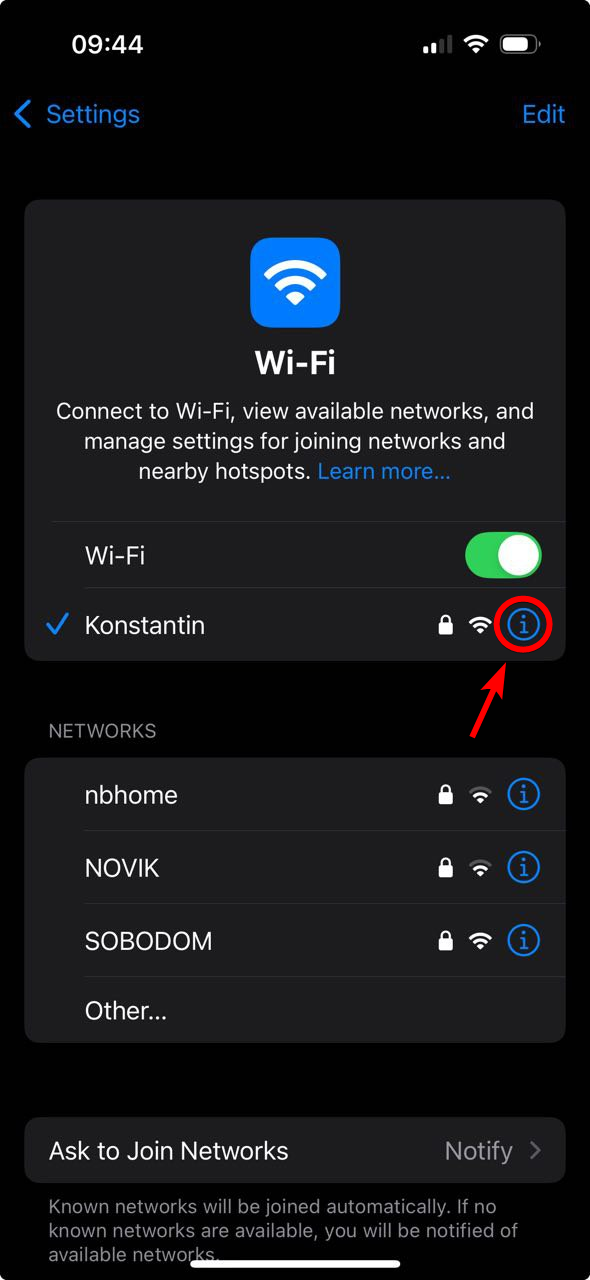
Connect to a Wi-Fi network and tap the ℹ️ icon next to it.
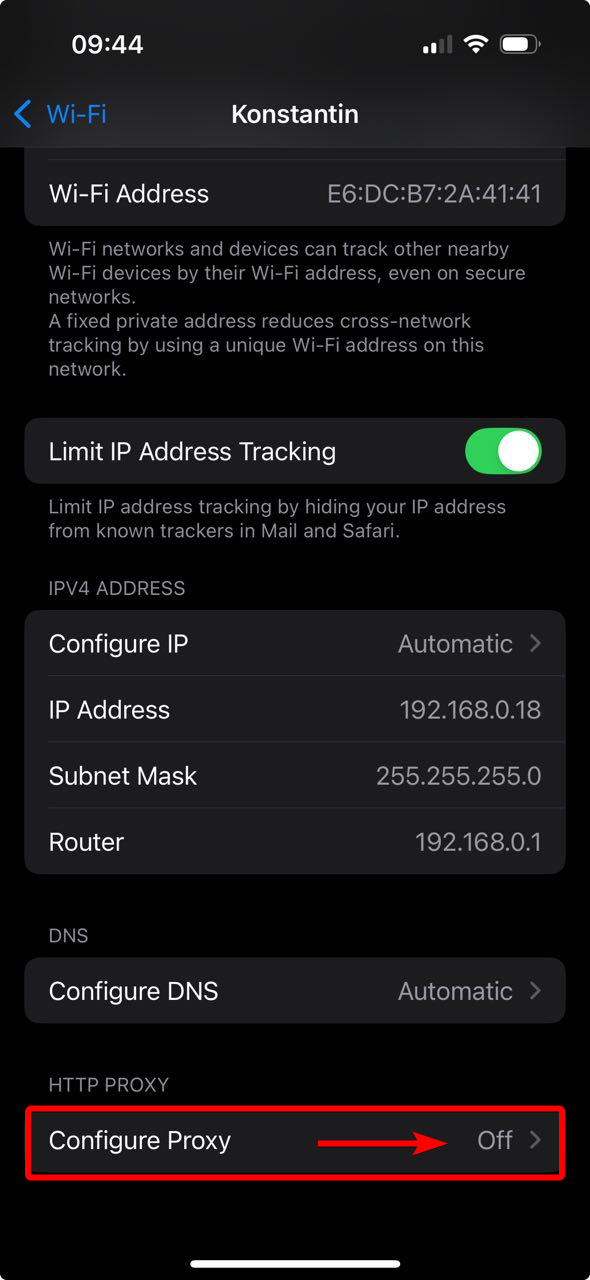
Scroll to the «Configure Proxy» section.
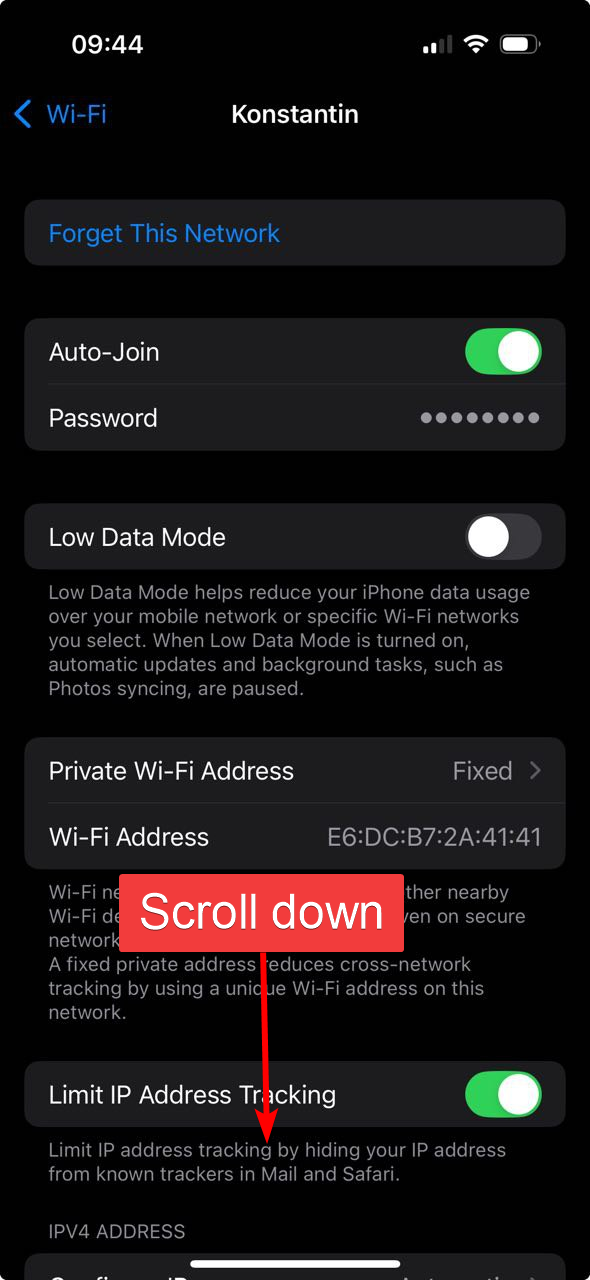
You should already have a proxy server and credentials. If not, purchase one.
Select «Manual» in proxy settings. Enter:
- «Server» - e.g., proxy.example.com or 192.168.1.1;
- «Port» - typically 4 or 5 digits;
- «Authentication» - Enable if your proxy requires username/password.
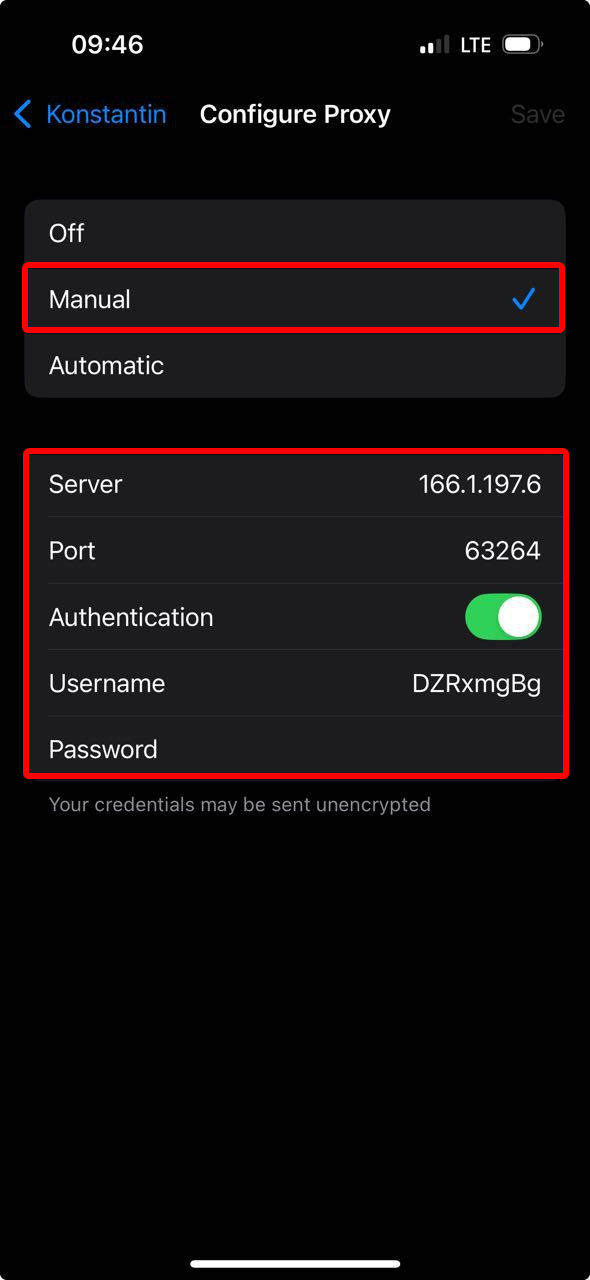
Tap «Save» in the top-right corner. Setup is complete.
Setting Up Proxy in Chrome on macOS
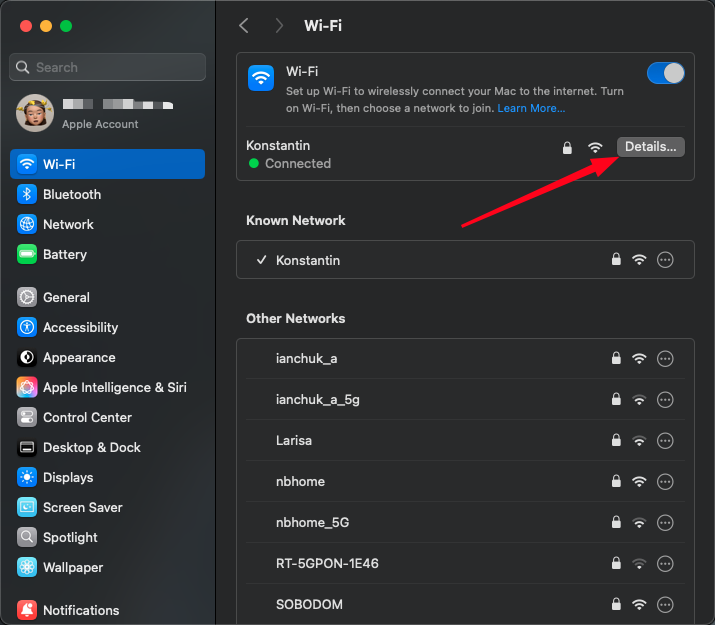
For Chrome proxy setup on macOS, use the system method. Go to System Preferences via the Apple logo.
![]()
Navigate to Wi-Fi settings and click «Details…» for your connected network.
Select proxy type (HTTP/HTTPS/SOCKS) in the proxy subsection.
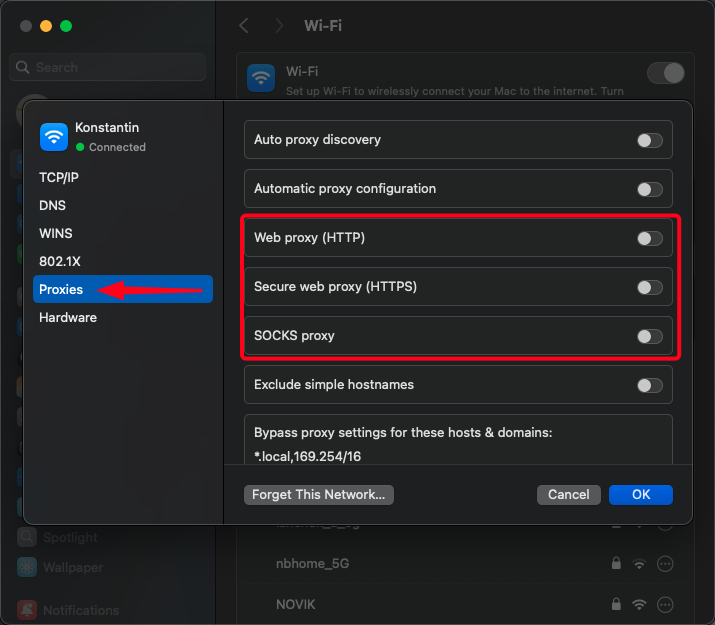
Enter proxy parameters:
- «Server» - e.g., proxy.example.com or 192.168.1.1;
- «Port» - typically 4 or 5 digits;
- «Proxy server requires password» - enable and enter credentials if required;
- «Exclude simple hostnames» — specify sites to bypass proxy.
Click «OK» to save. Setup is complete.
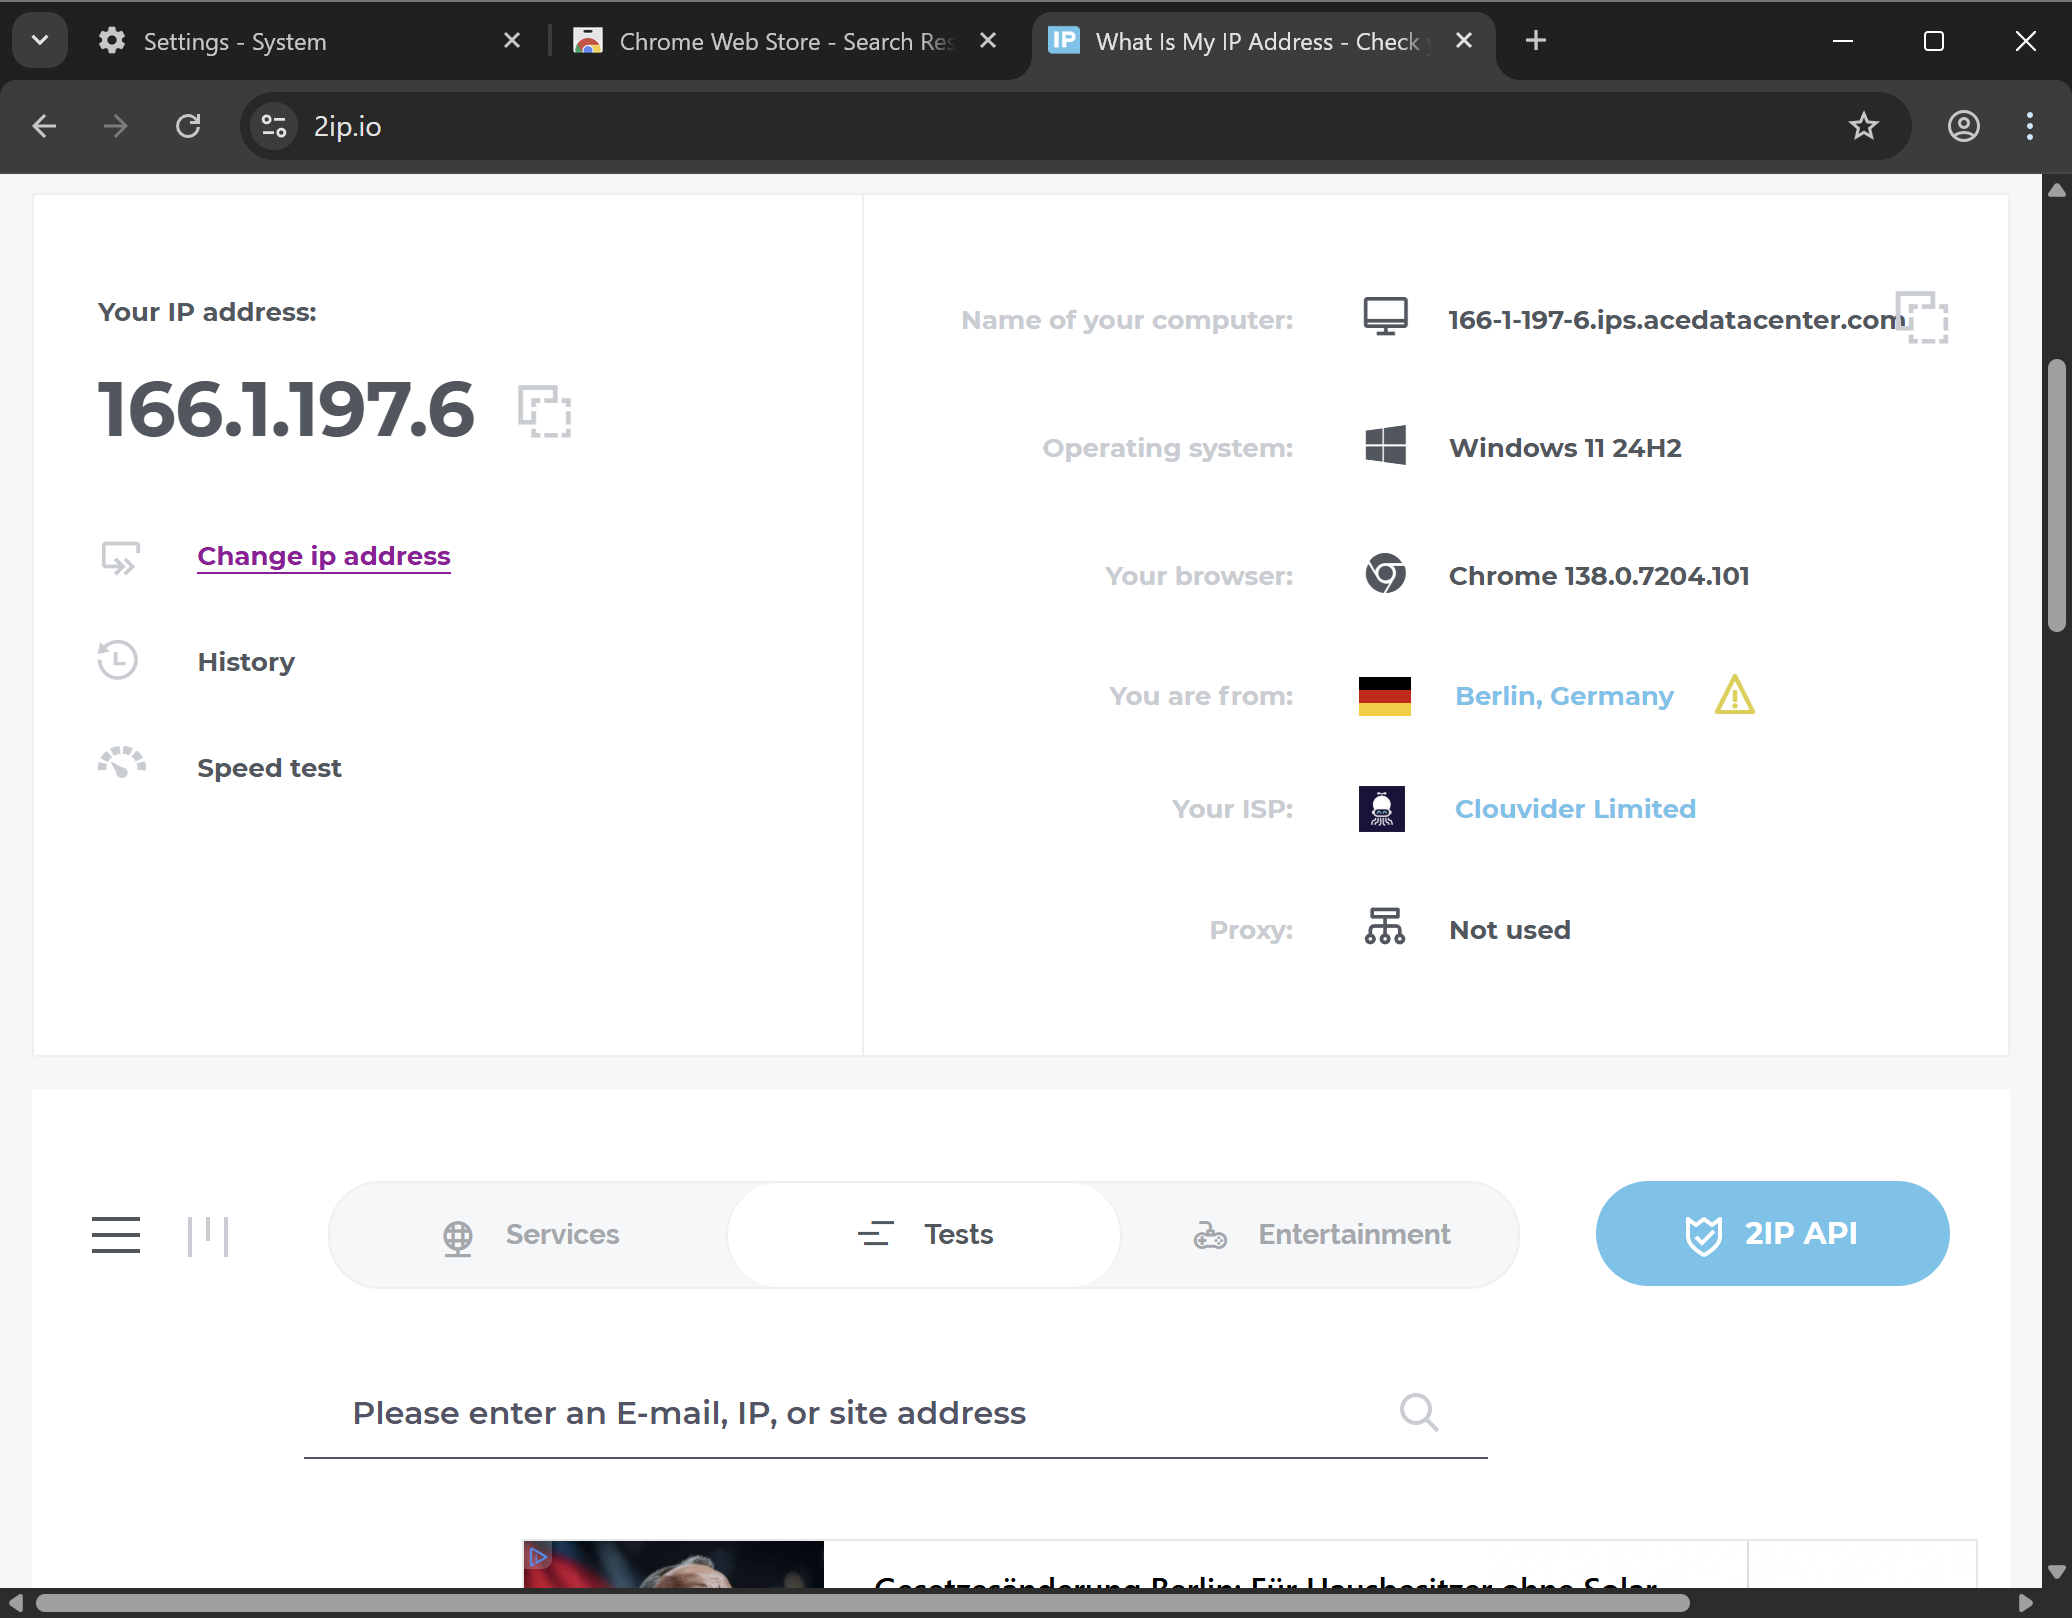
Check Your Internet Connection
Open Chrome and visit any IP-checking site. If configured correctly, your IP address will change.
Frequently Asked Questions
Where to get proxies for Chrome?
- Search Google for free proxy lists. Some sites publish these to monetize traffic. Not recommended: attackers may intercept your data.
- Buy proxies. Choose country, proxy type, rental period, traffic volume, and ensure security.
- Set up your own proxy server. Suitable for users with existing servers (home/work) wanting to route traffic through them.
Why use a proxy in Chrome?
- Access geo-restricted websites/services;
- Anonymity and data protection — hide real IP address;
- Change geolocation — access region-locked content;
- Occasionally used for ad-blocking and traffic savings.