How to Set Up a Proxy in Microsoft Edge
Microsoft Edge does not have a built-in feature for connecting to a proxy server. To route traffic through Edge using a proxy, you need to configure the proxy at the operating system level.
Setting Up a Proxy in Microsoft Edge on Windows
Click the hamburger menu in Edge and scroll down to the «⚙️ Settings» option.
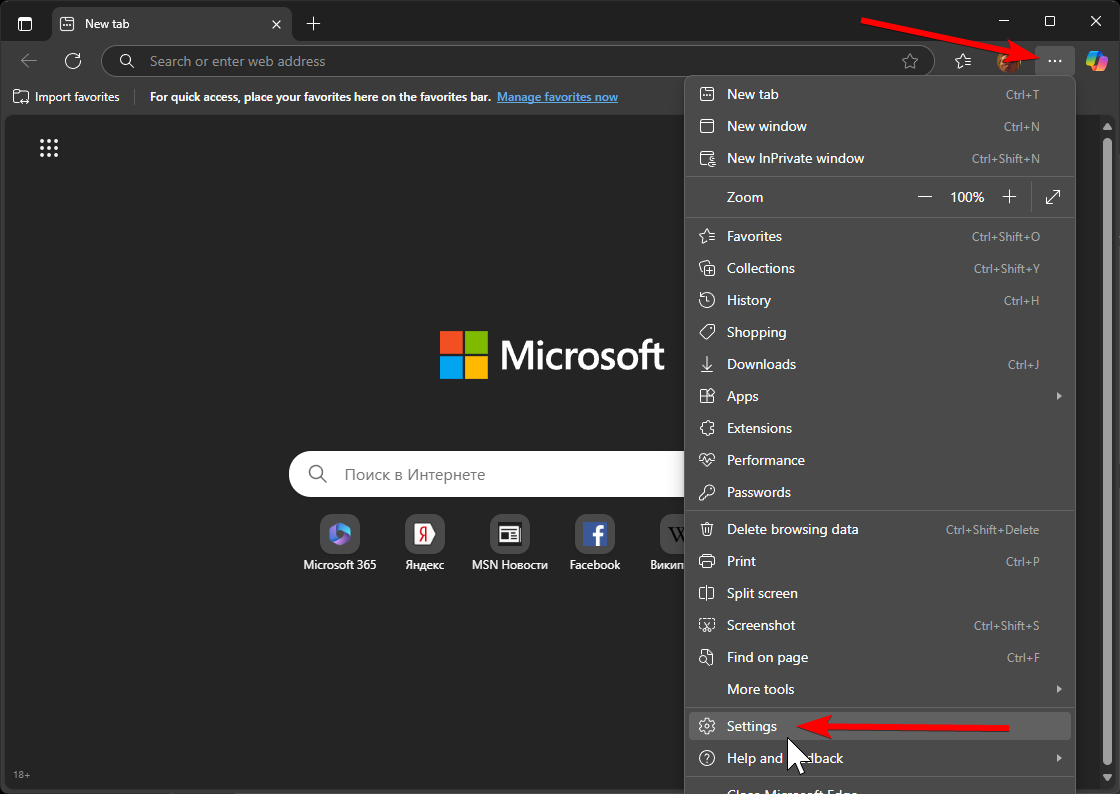
Click «System and performance» in the sidebar and go to the «System» section (edge://settings/system/manageSystem).

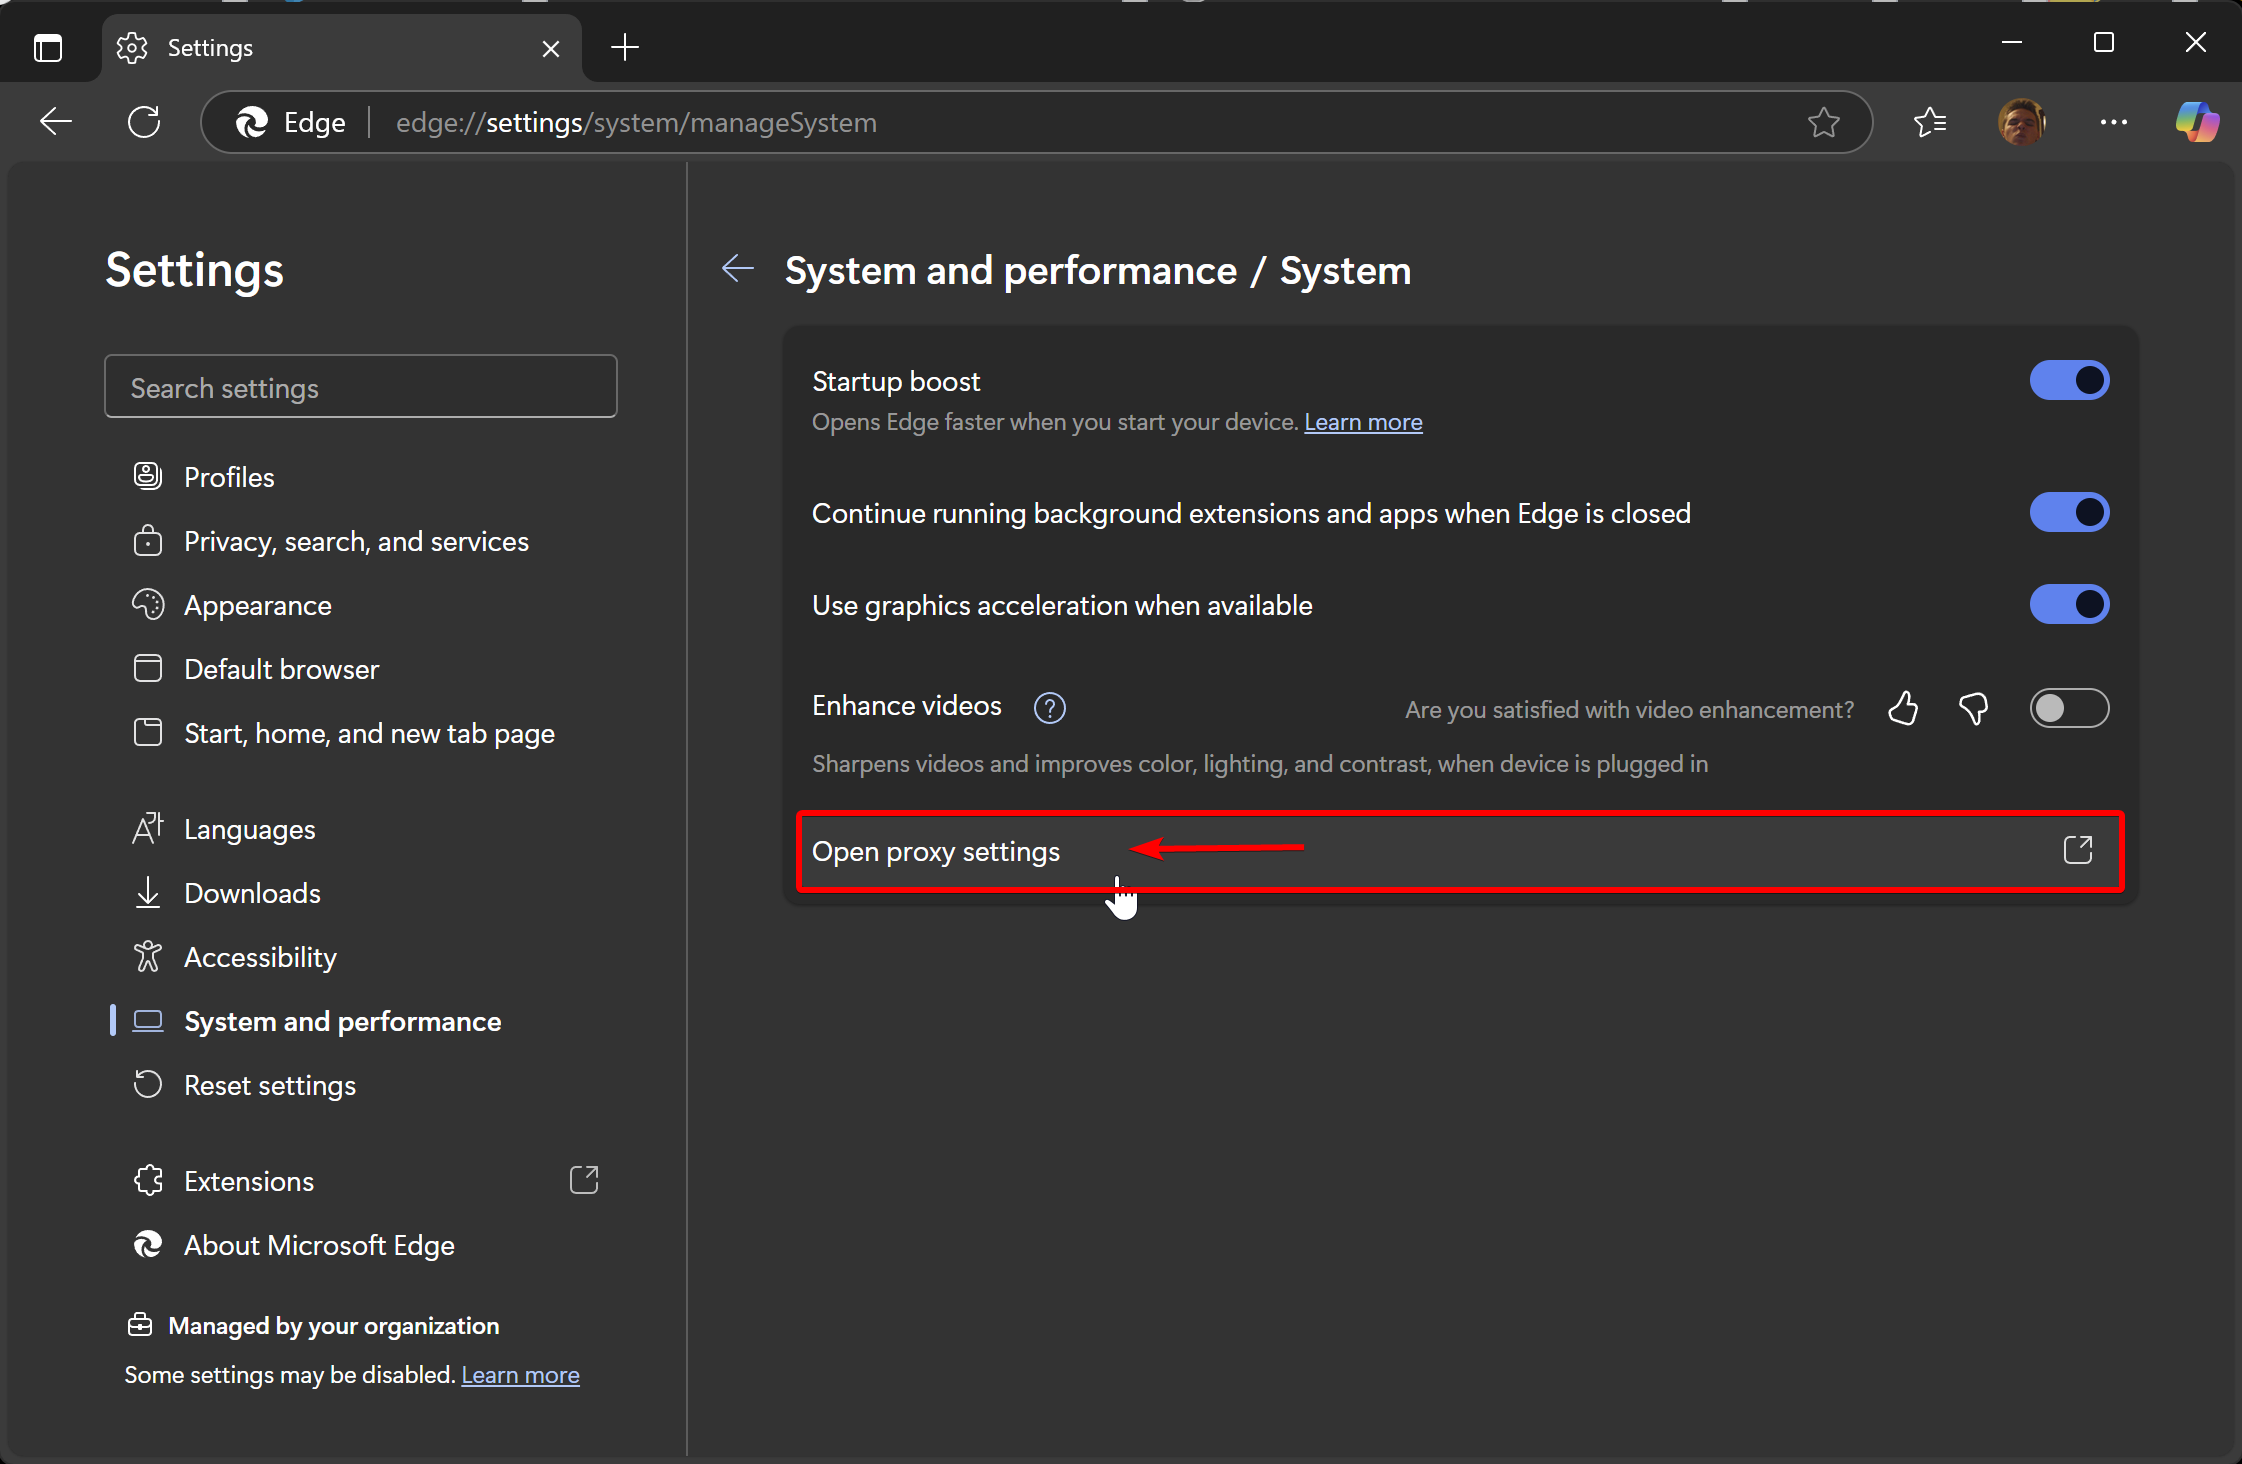
Click «Open proxy settings ↗.» This will bring up the Windows proxy settings dialog since Edge doesn’t have its own built-in proxy configuration. If you set up a proxy in your OS, it will apply system-wide — not just to Edge.
Select the manual proxy setup section. At this stage, you should already have your own proxy server and credentials ready to enter. If you don’t have a proxy yet, you’ll need to purchase one.
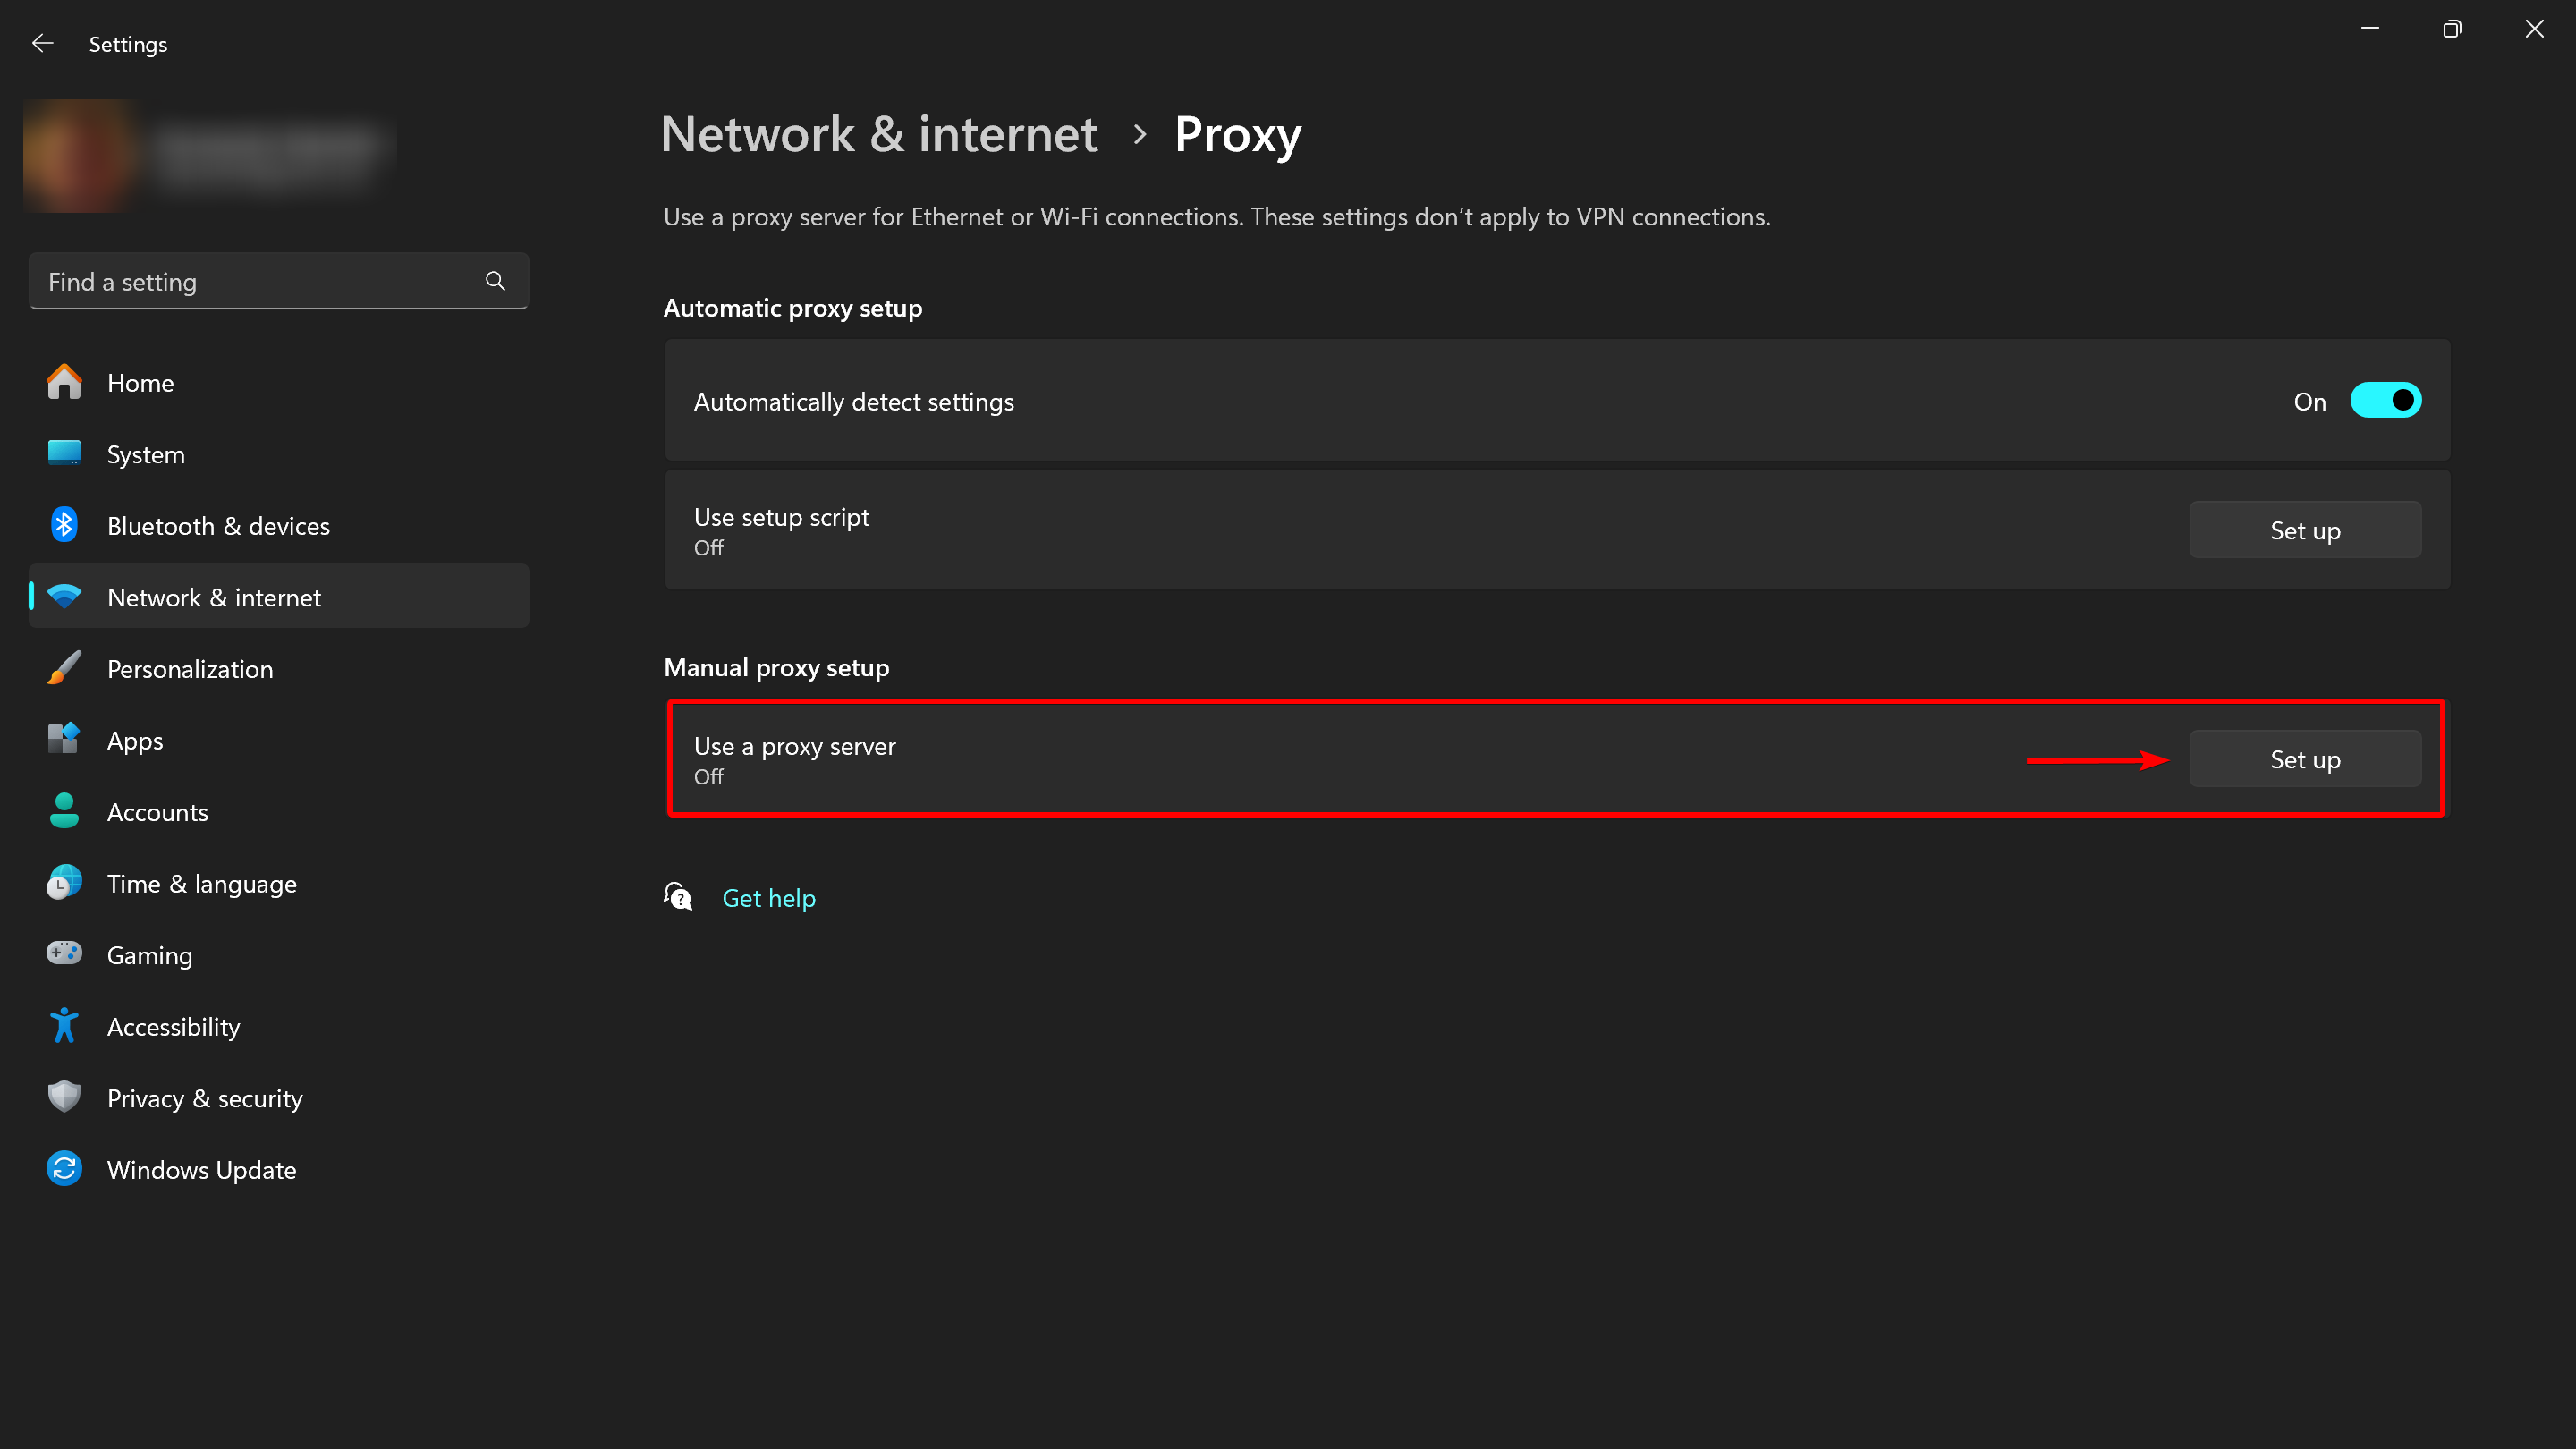
Fill out your proxy server settings:
- «Proxy IP address» – for example, proxy.example.com or 192.168.1.1;
- «Port» – typically 4 or 5 digits;
- Username and password for the proxy will be requested later when you open any website or app. In our example, these fields are not present in this window.
- «Use the proxy server except …» — you can specify websites that should bypass the proxy, separated by semicolons (;).
- «Don’t use the proxy server for local (intranet) addresses» — you can disable proxy usage for local connections.
Click «Save.» If your proxy is IP-authorized and doesn’t require a username and password, you’re done setting up the proxy on Windows.

See our detailed guide on setting up a proxy on Windows.
Setting Up a Proxy in Edge Using Extensions
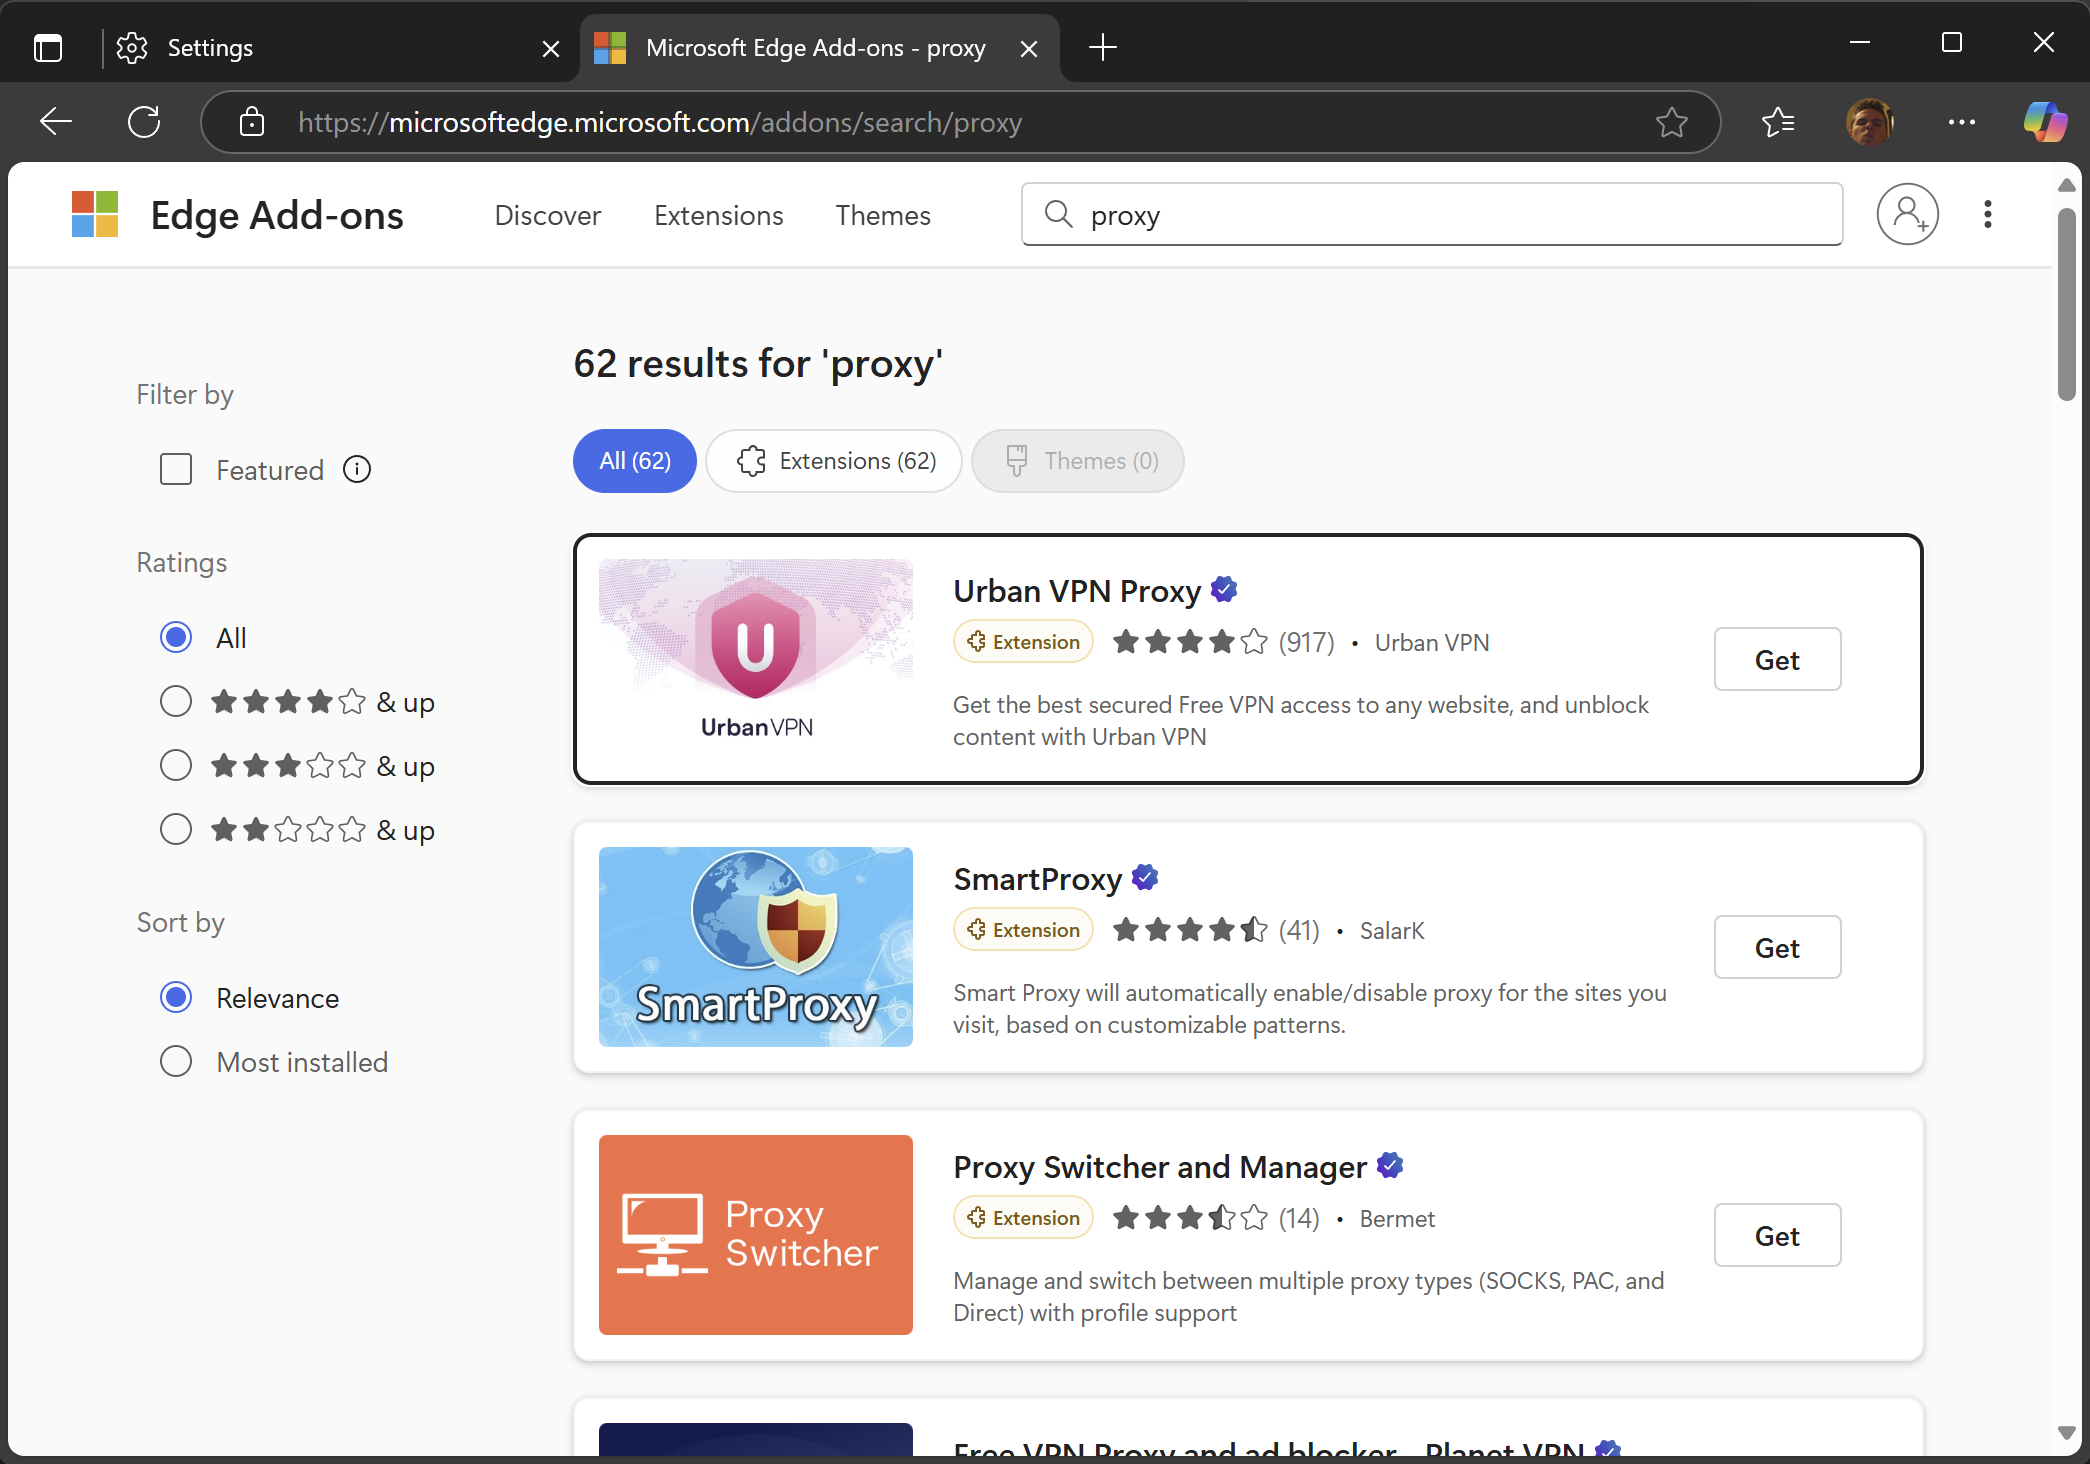
If configuring a proxy through your OS (Windows or macOS) doesn’t suit you, there’s an alternative: browser extensions. Open Microsoft Edge Add-ons and search for «proxy» — you’ll see dozens of options. Choose based on ratings and reviews.
Setting Up a Proxy in Edge on Android
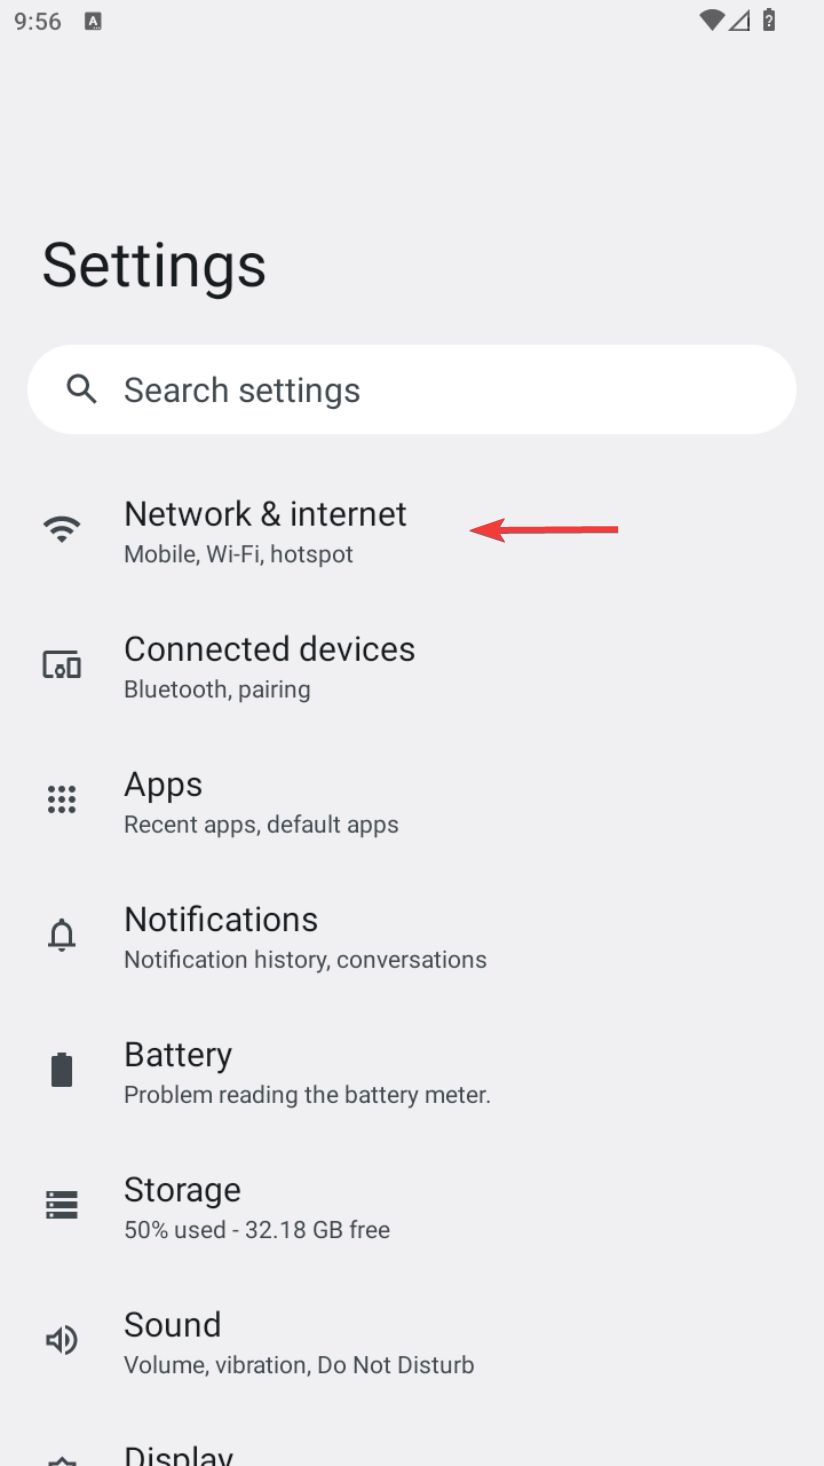
To set up a proxy in Edge on Android, use the system method. Go to Settings and select «Network & Internet.»
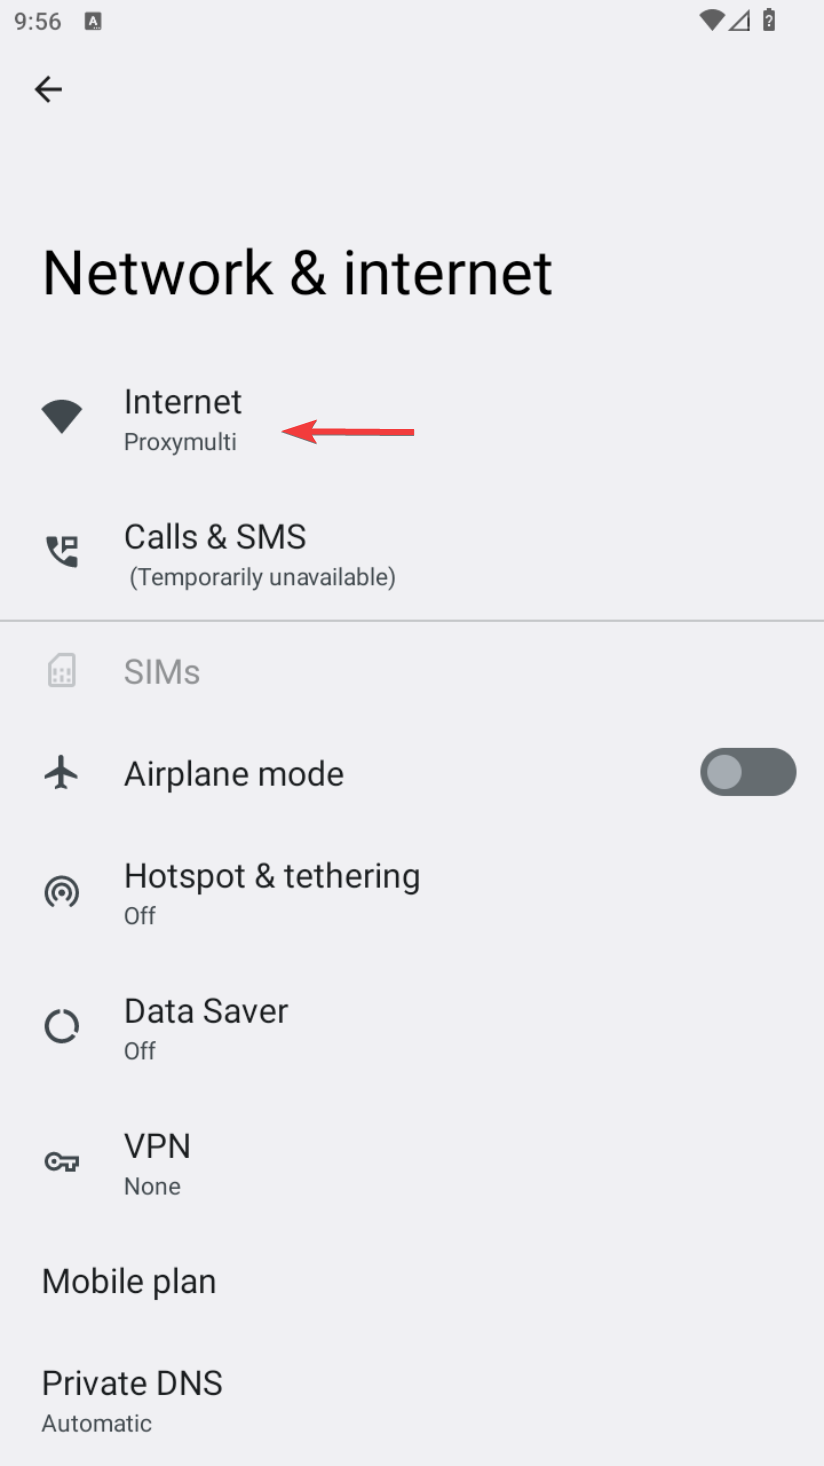
Next, go to the Wi-Fi section.
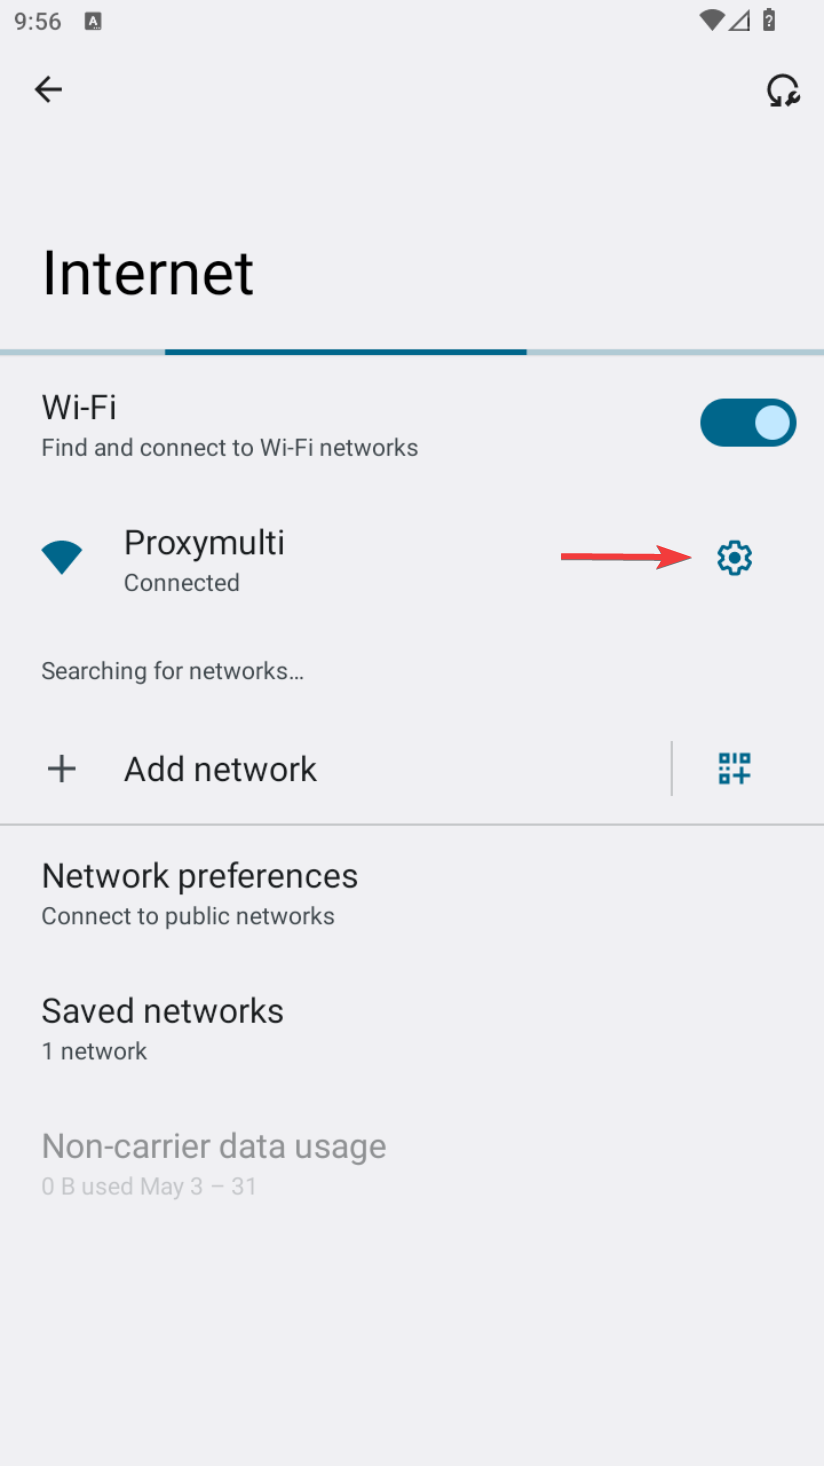
Connect to a Wi-Fi network and tap the ⚙️ icon next to it.
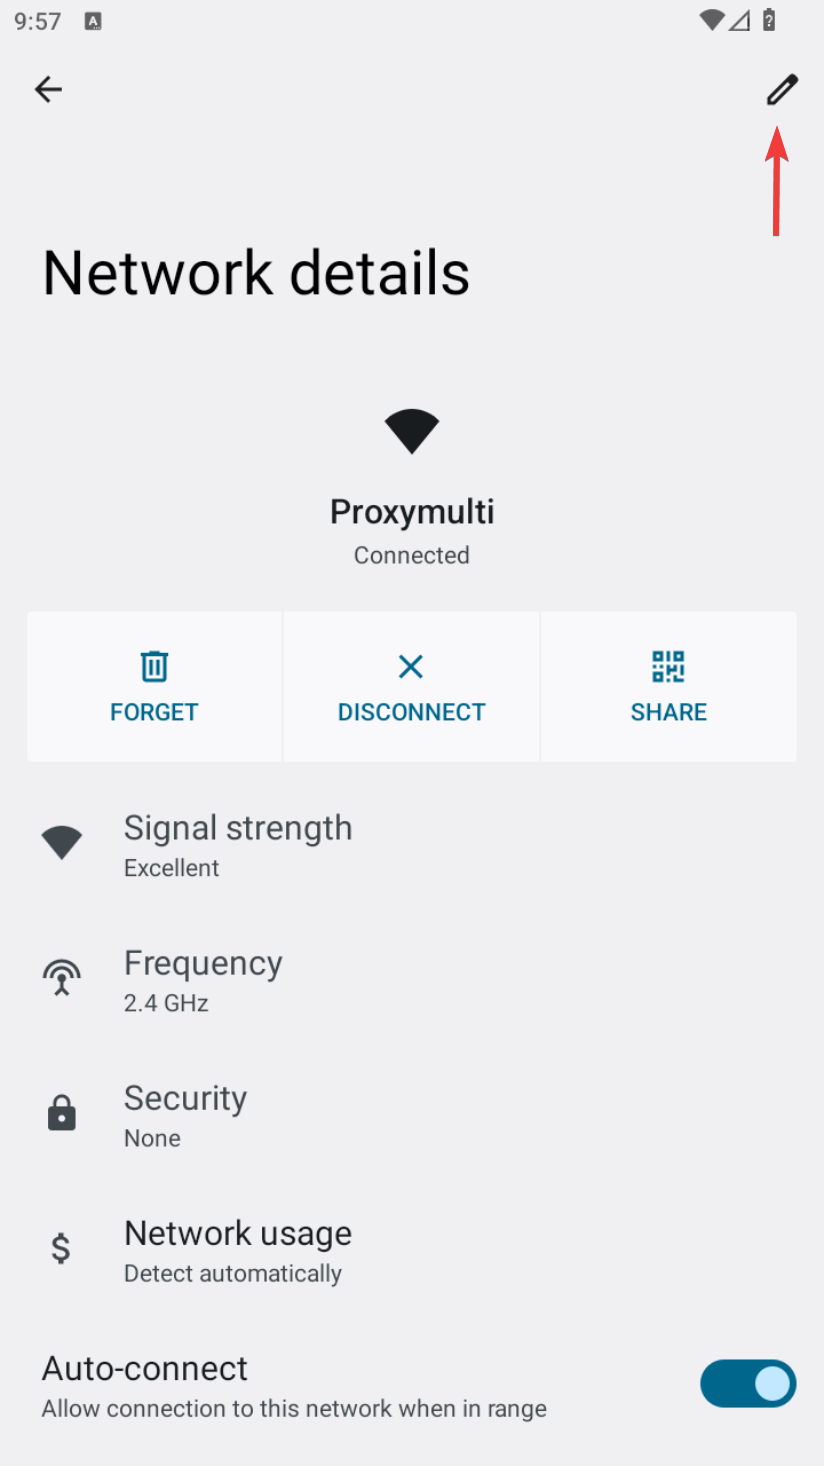
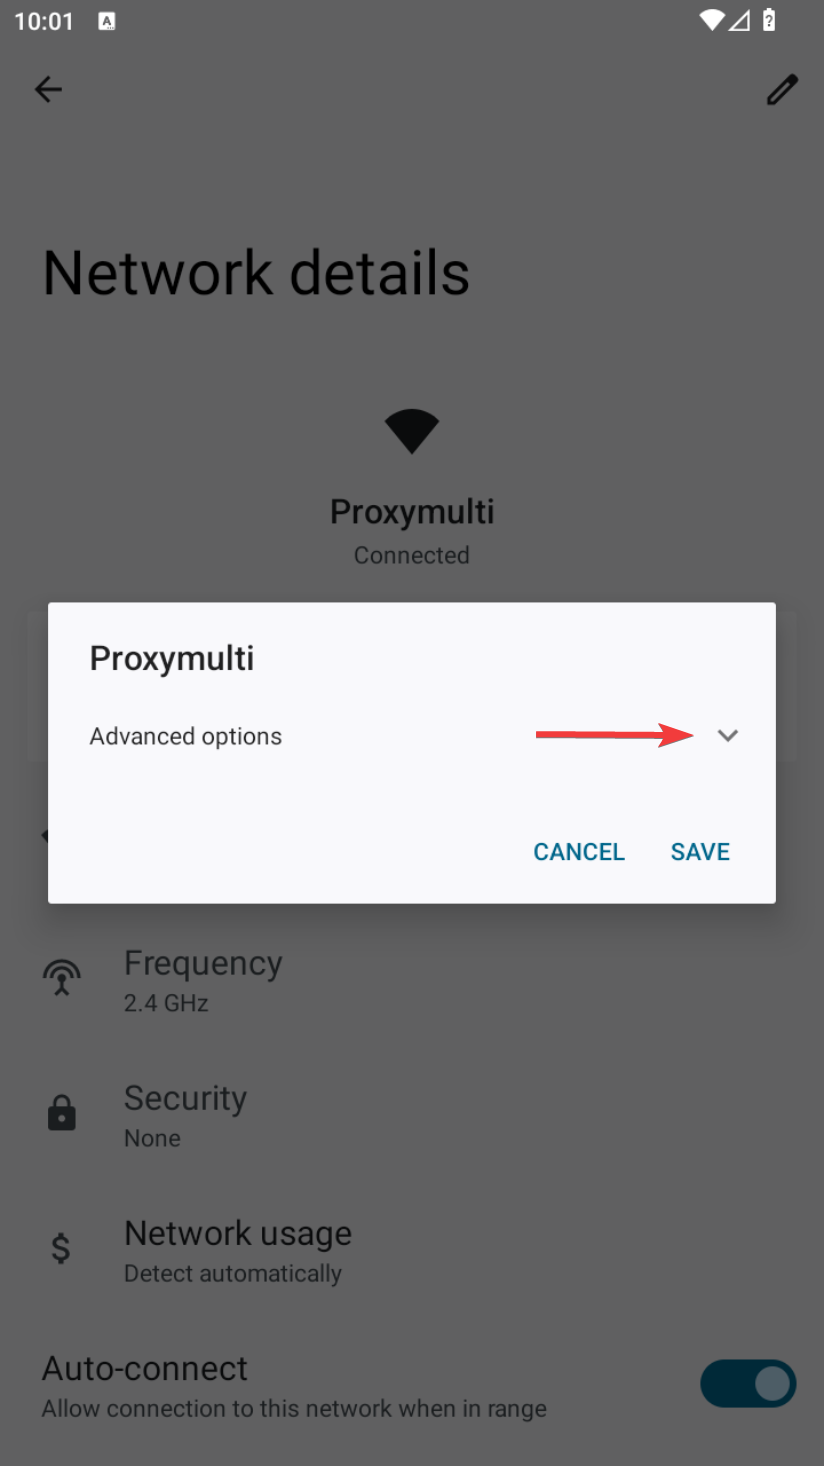
In the opened settings window for the selected Wi-Fi network, look for the edit button in the top right corner.
Expand the advanced options dropdown in the dialog.
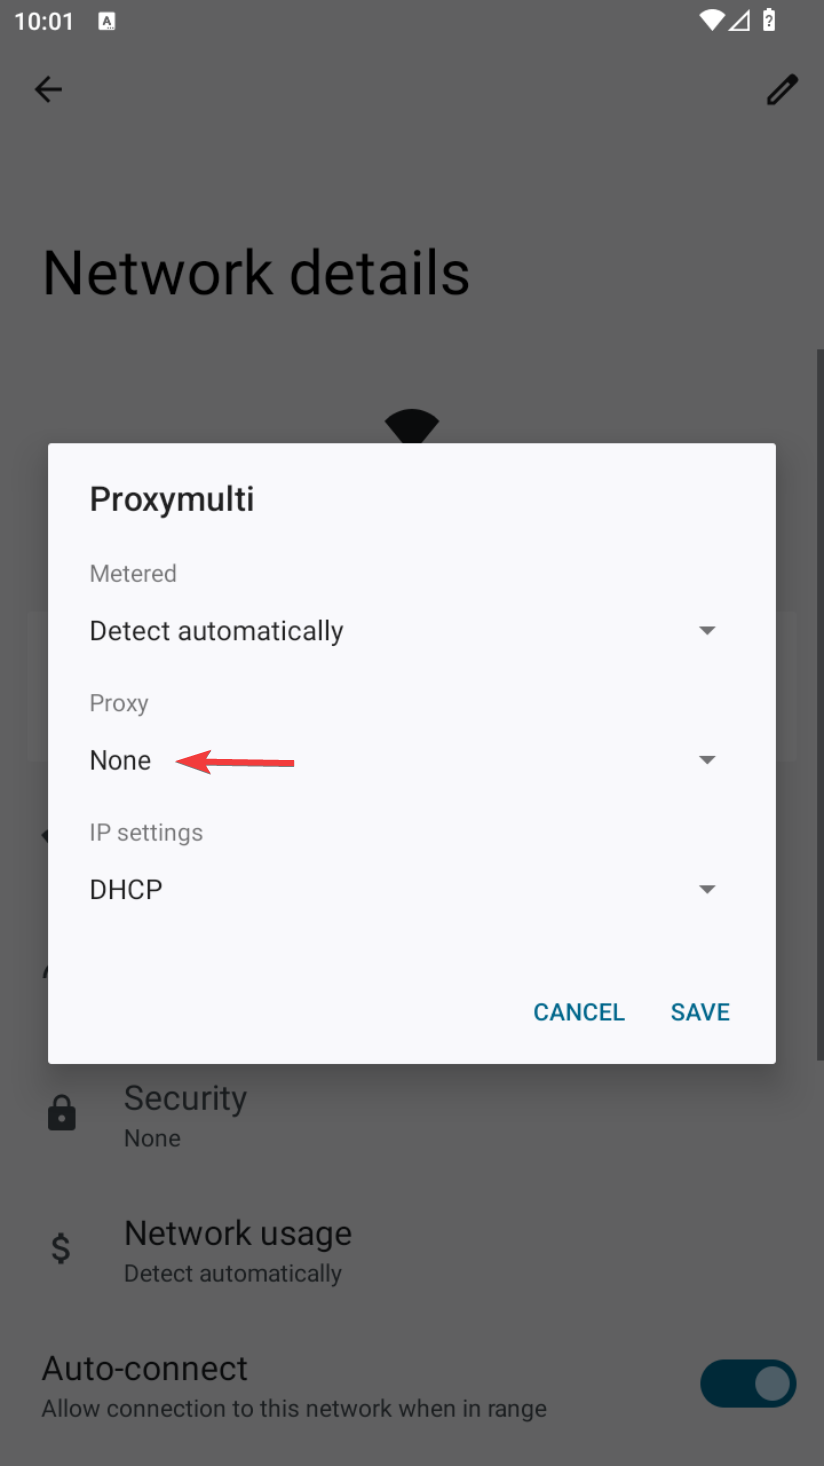
Select «Manual» — this will open a form with additional options.
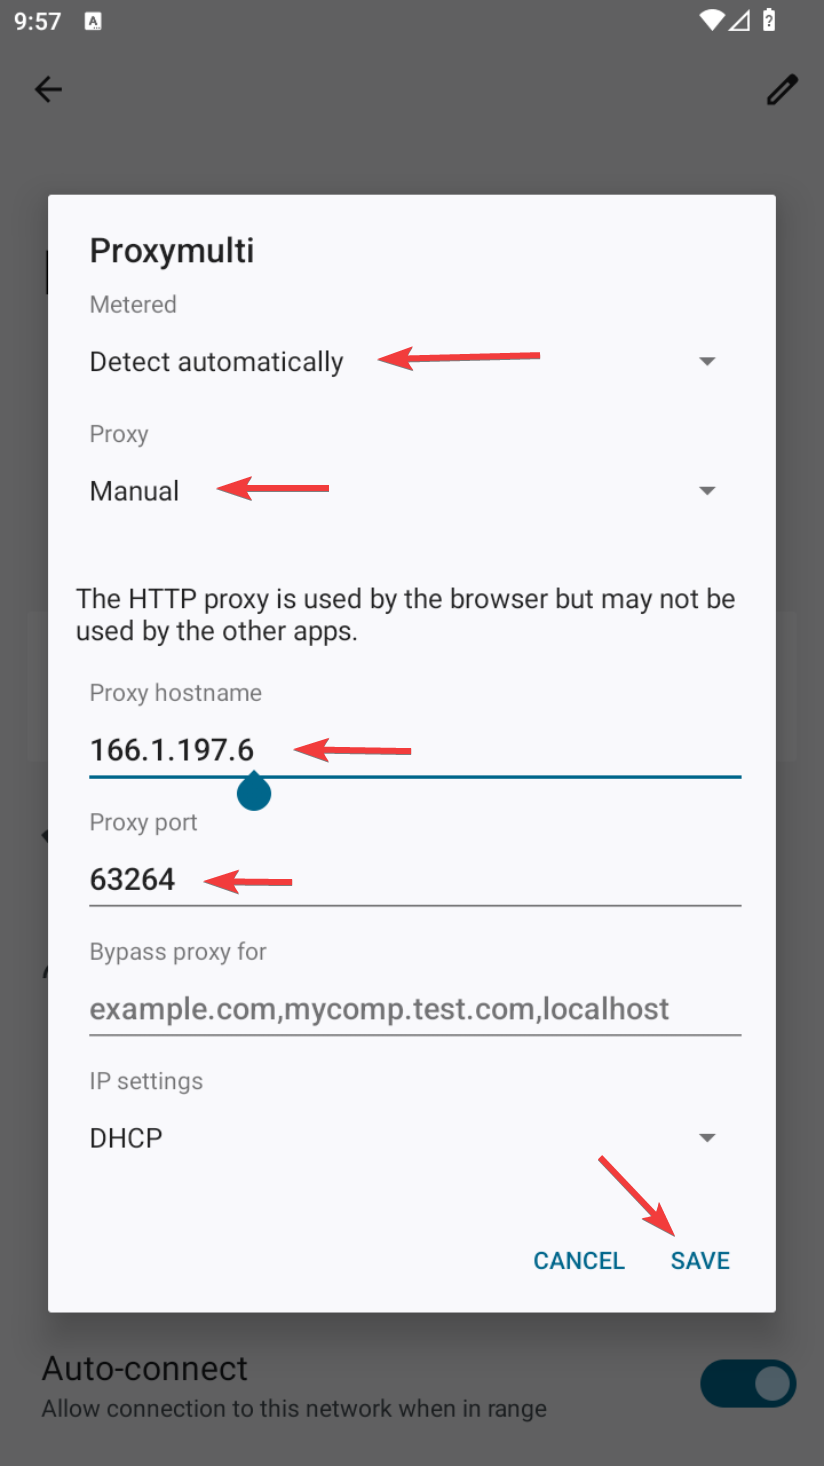
At this stage, you should already have your own proxy server and credentials to enter. If you don’t have a proxy yet, you’ll need to purchase one.
Enter your proxy connection settings:
- «Proxy hostname» – for example, proxy.example.com or 192.168.1.1;
- «Proxy port» – typically 4 or 5 digits;
- Username and password for the proxy will be requested later when you open any website or app. In our example, these fields are not present in this window;
- «Bypass proxy for» — specify which websites should bypass the proxy, separated by commas.
Tap «Save.» If your proxy is IP-authorized and doesn’t require a username or password, the setup on Android is complete.
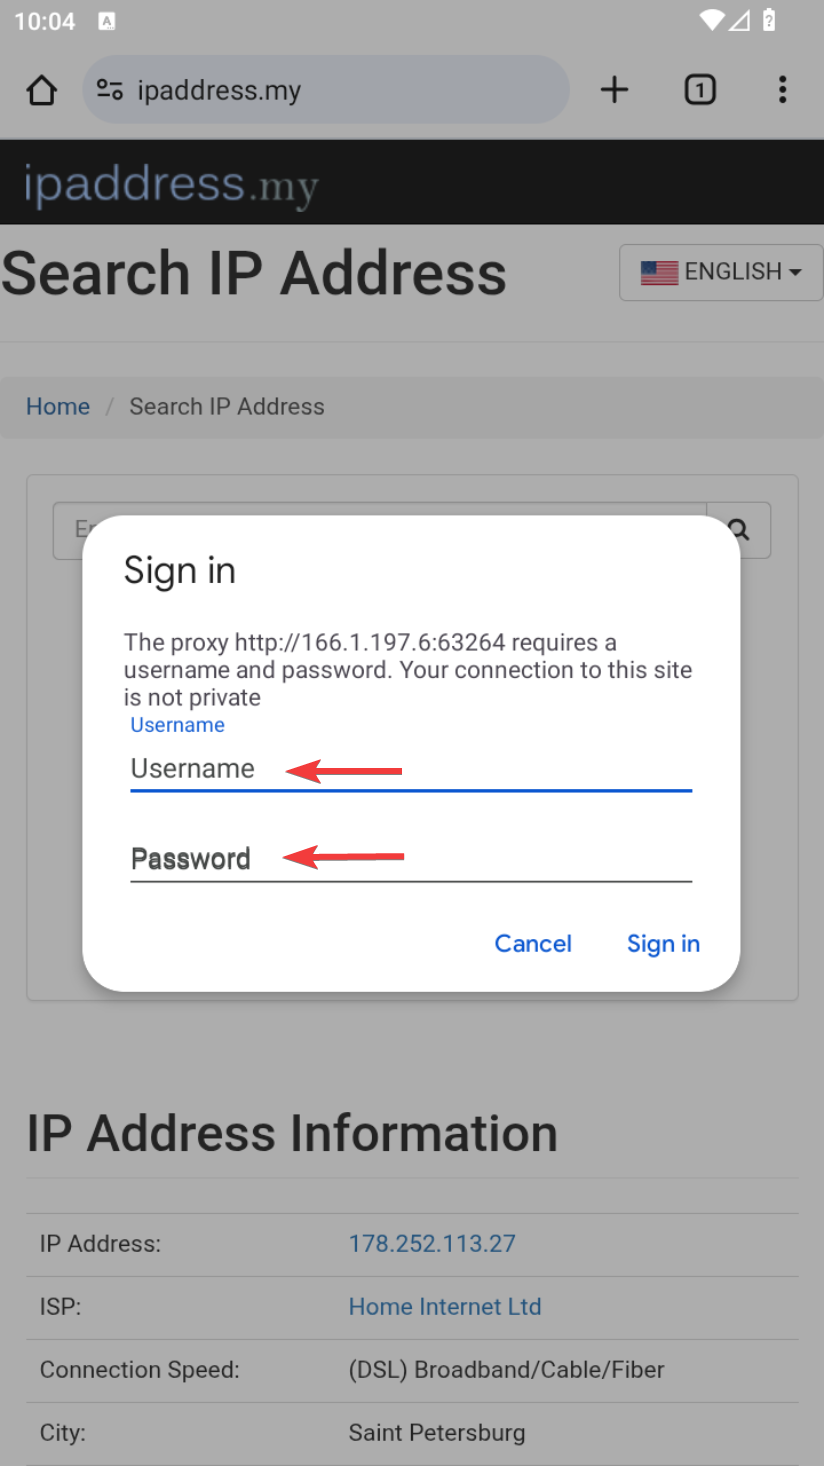
If your proxy requires authentication, you’ll be prompted to enter a username and password when you access any website in Edge. A dialog box will appear for entering your proxy credentials.
Setting Up a Proxy in Edge on iPhone
To set up a proxy in Edge on iOS, use the system method. Go to Settings and select «Wi-Fi.»
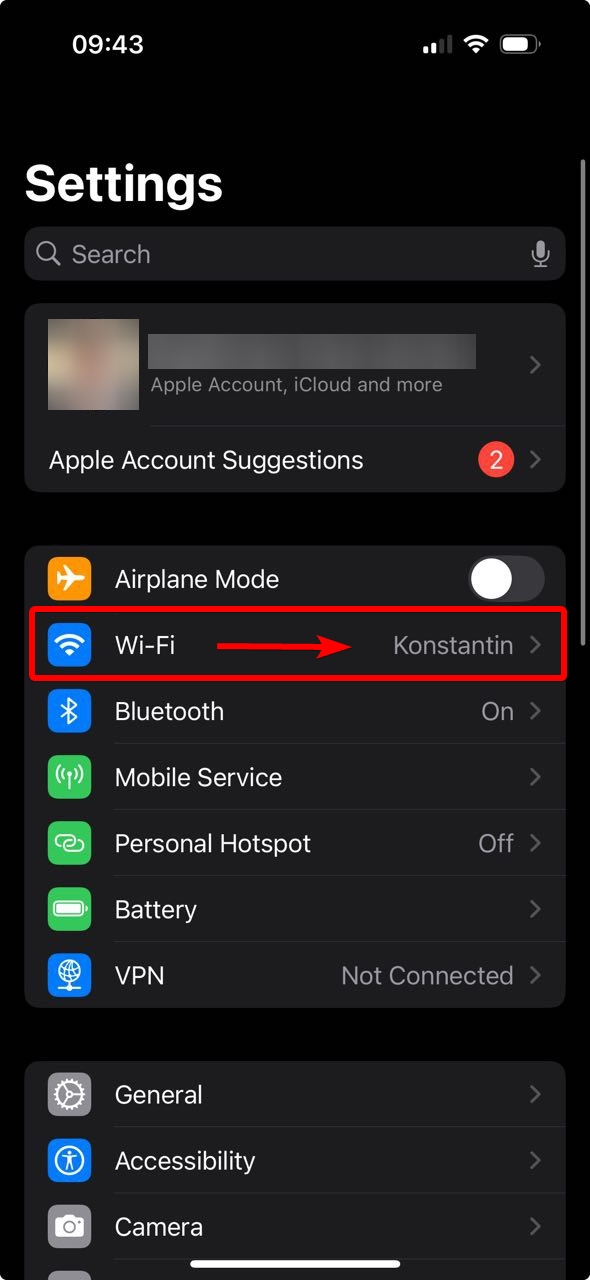
Connect to a Wi-Fi network and tap the ℹ️ icon next to it.
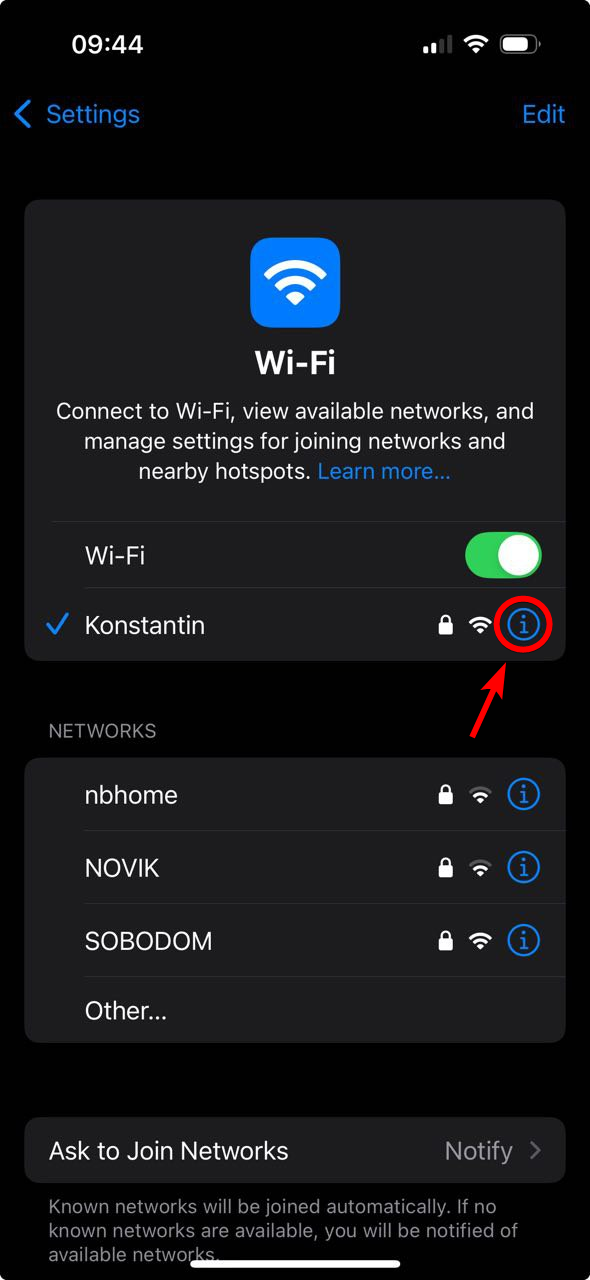
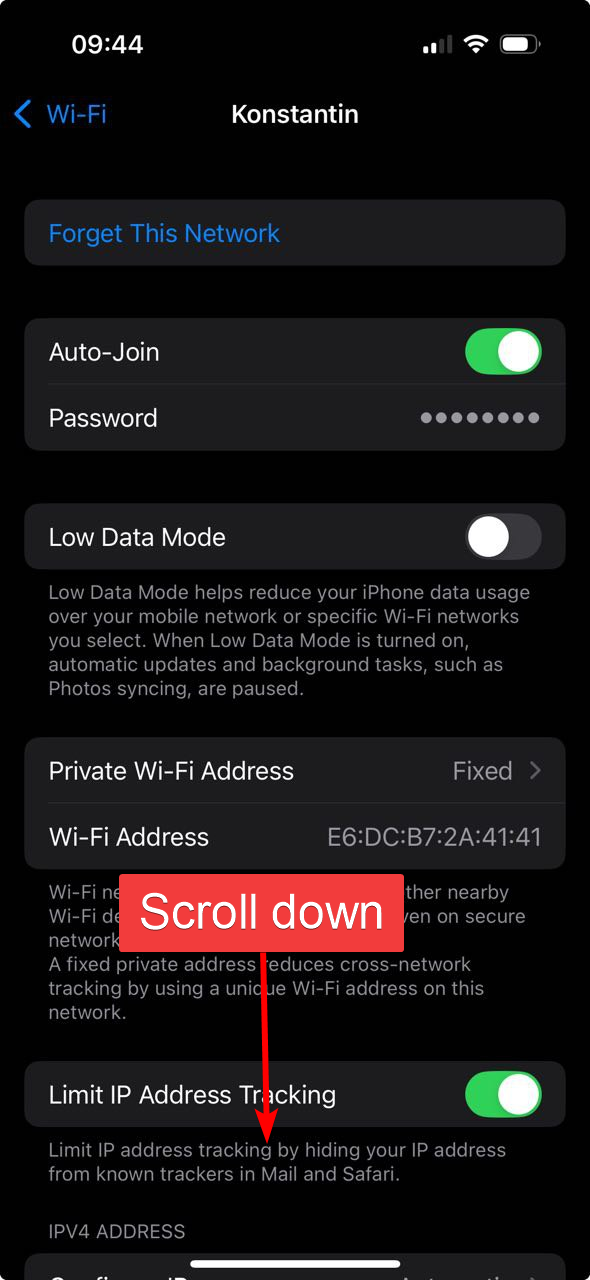
This will open the settings menu for the selected Wi-Fi network. Scroll down to the proxy settings section.
At this point, you should already have your own proxy server and credentials to enter. If you don’t have a proxy yet, you’ll need to purchase one.
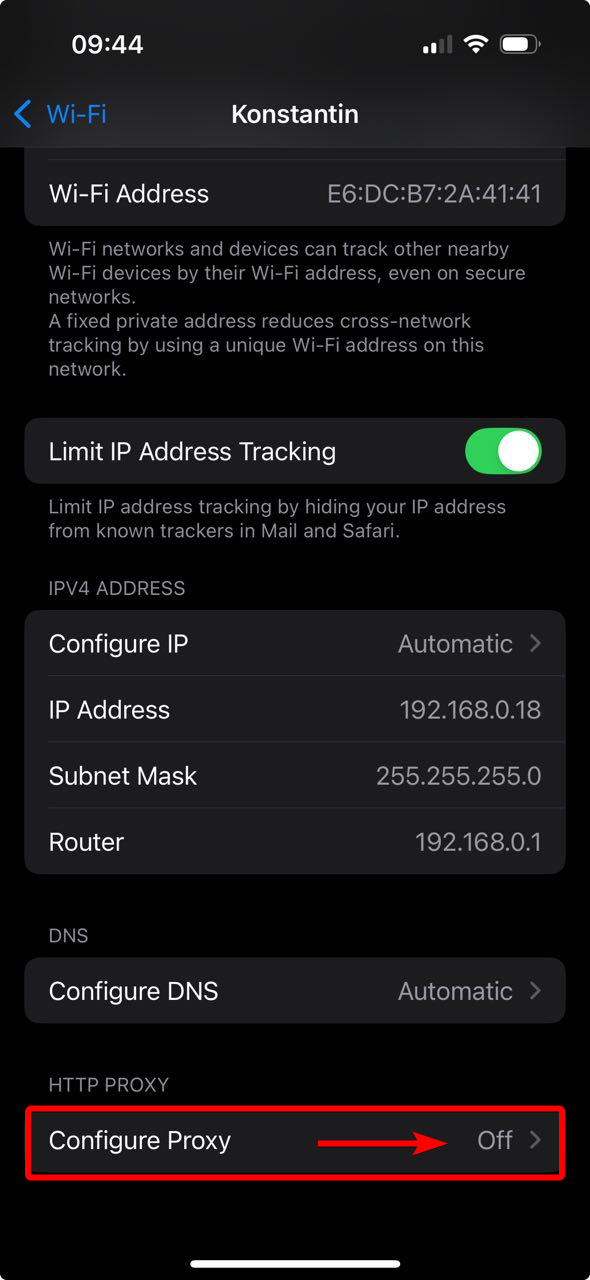
Enter your proxy connection settings: in the opened window, select «Manual.» A proxy settings window will appear below:
- «Server» – for example, proxy.example.com or 192.168.1.1;
- «Port» – typically 4 or 5 digits;
- «Authentication» – enable this if your proxy server requires a username and password.
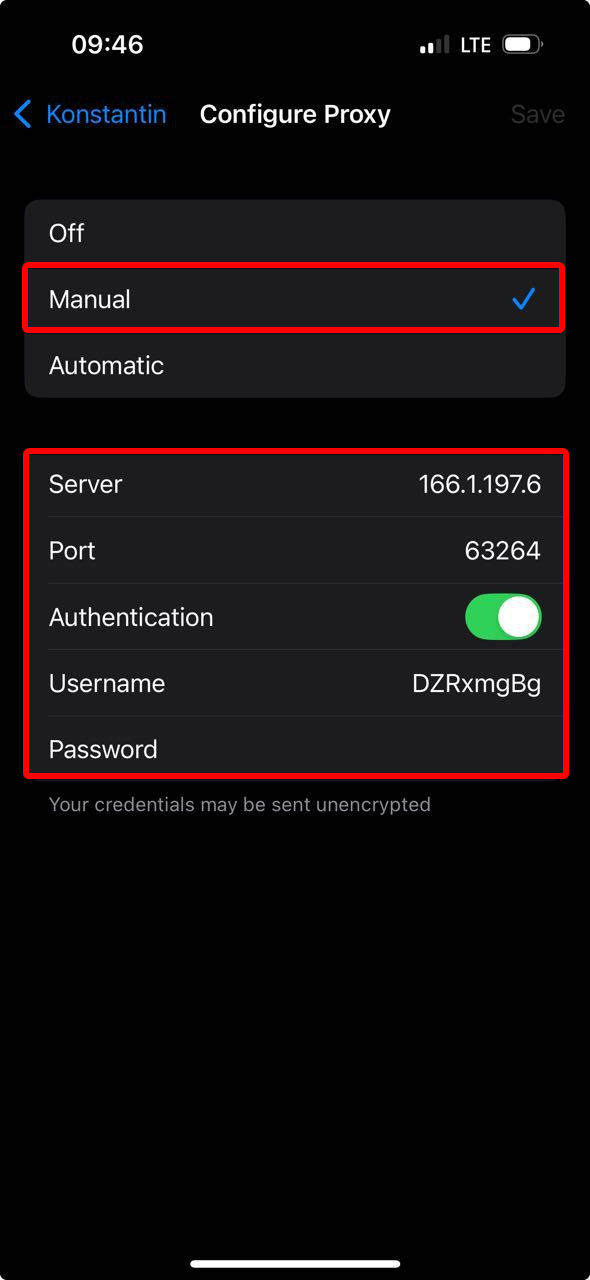
Tap «Save» in the upper right corner. Proxy setup on iPhone is now complete.
Setting Up a Proxy in Edge on macOS
To set up a proxy in Edge on macOS, use the system method. Go to System Settings by clicking the Apple icon in the top left corner.
![]()
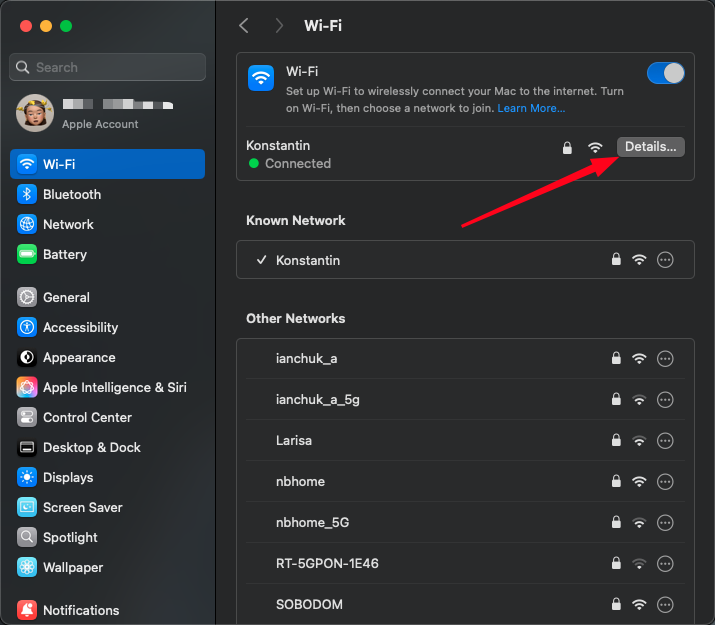
Go to the Wi-Fi settings section and click «Details…» next to the connected network.
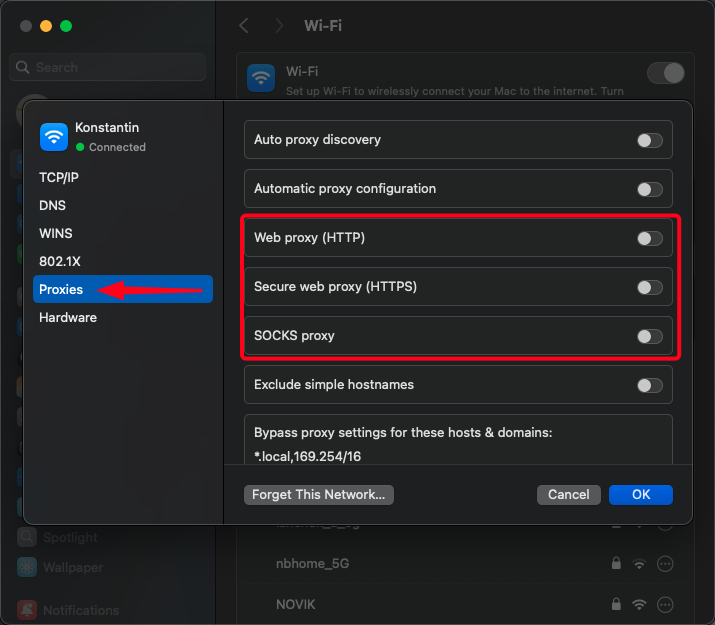
Enter your proxy connection settings: go to the proxies section and select the type of proxy — HTTP, HTTPS, or SOCKS.
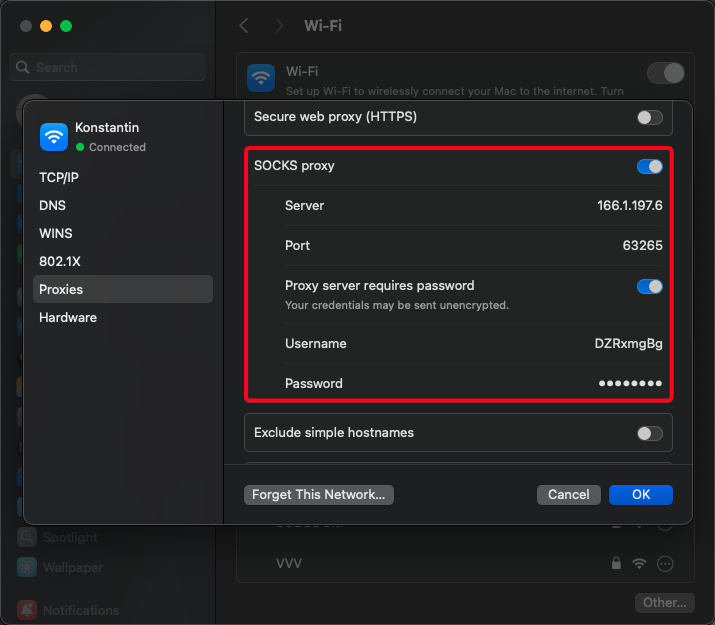
Fill out the fields for your proxy server:
- «Server» – for example, proxy.example.com or 192.168.1.1;
- «Port» – typically 4 or 5 digits;
- «Proxy server requires password» – if your proxy requires a username and password, check this option and enter them;
- «Exclude simple hostnames» — you can specify which websites should bypass the proxy.
Click «OK» to save your settings. Proxy setup on macOS is now complete.
Check Your Internet Connection
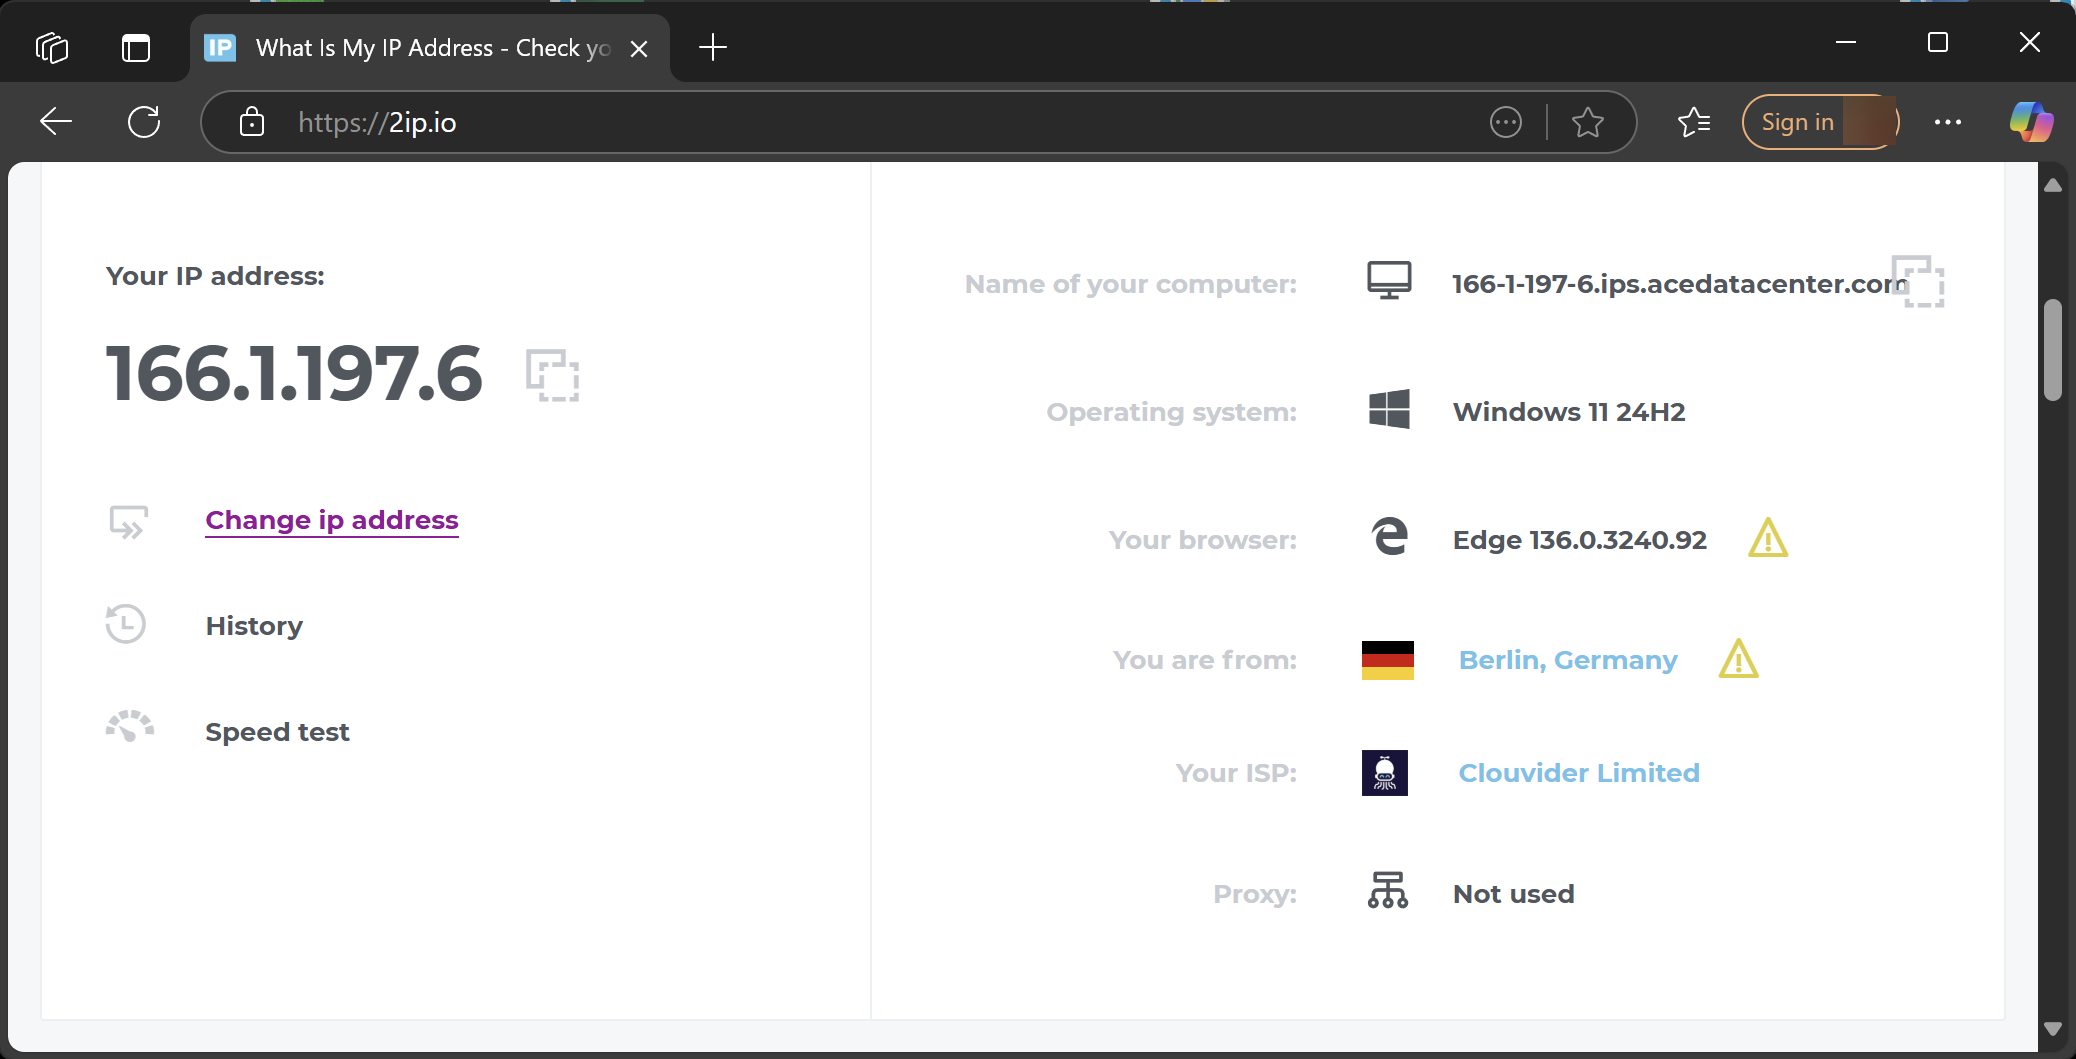
Open Edge and try to load any website that displays your IP address. If everything is set up correctly, you’ll see that your IP address has changed.
Frequently Asked Questions
Where can I get a proxy for Edge?
- Search for free proxy lists on Google. Some sites publish these proxies to make money from traffic. I don’t recommend this option because malicious actors could intercept your data sent through the device.
- Buy a proxy. In this case, you can choose the country, type of proxy, rental period, bandwidth, and be sure your connection is secure.
- Set up your own proxy server. This option is for those who have their own server (for example, at home or work) and want to route their traffic through it.
Why use a proxy in Edge?
- To access websites and services restricted in your region;
- For anonymity and data protection — hiding your real IP address;
- To change your geolocation and access region-locked content;
- In some cases, proxies are used to block ads and save bandwidth.