Configuring a Proxy in macOS via System Settings
How to configure a proxy server in macOS via system settings. This step-by-step guide uses macOS 15.5 as an example. It’s also relevant for macOS 13+, since the system settings interface—including the proxy section—changed starting from version 13.
Open macOS System Settings
Go to System Settings via the Apple icon in the upper left corner.
![]()
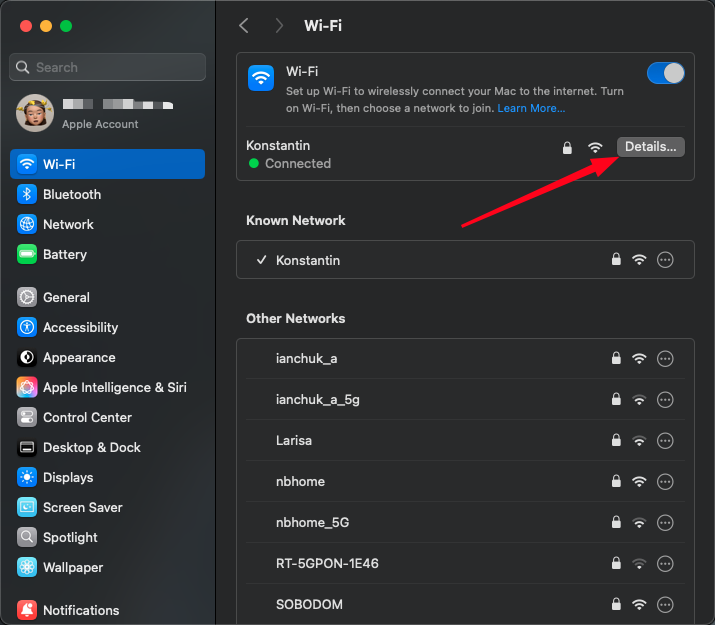
Navigate to the Wi-Fi settings section and click “Details…” on the connected network.
Enter Proxy Server Connection Settings
Go to the proxy settings subsection and select the proxy type: HTTP, HTTPS, or SOCKS.
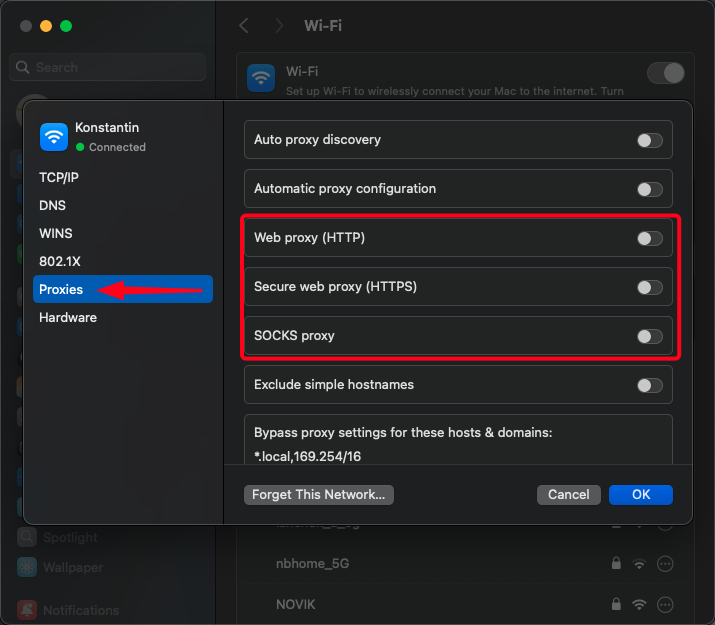
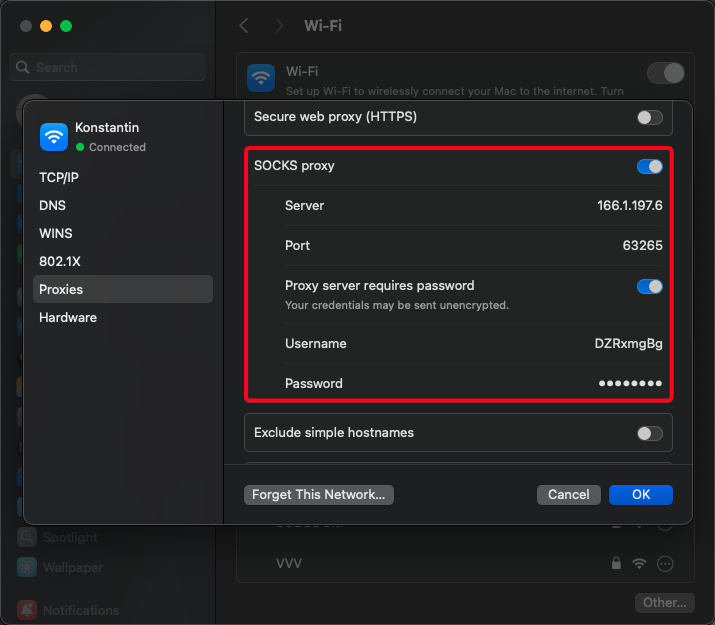
Fill in the proxy server parameters:
- IP address or server hostname (e.g., proxy.example.com or 192.168.1.1);
- Port (usually 4 or 5 digits);
- If your proxy requires a username and password, check this option and enter them;
- Exclude simple hostnames — you can specify which sites should bypass the proxy.
Click “OK” to save the settings. Your proxy is now configured on macOS.
Check Internet Connection and IP Address Change
Open, for example, the Safari browser and try to access any website that shows your IP address. In my case, Safari additionally prompted for the proxy username and password.
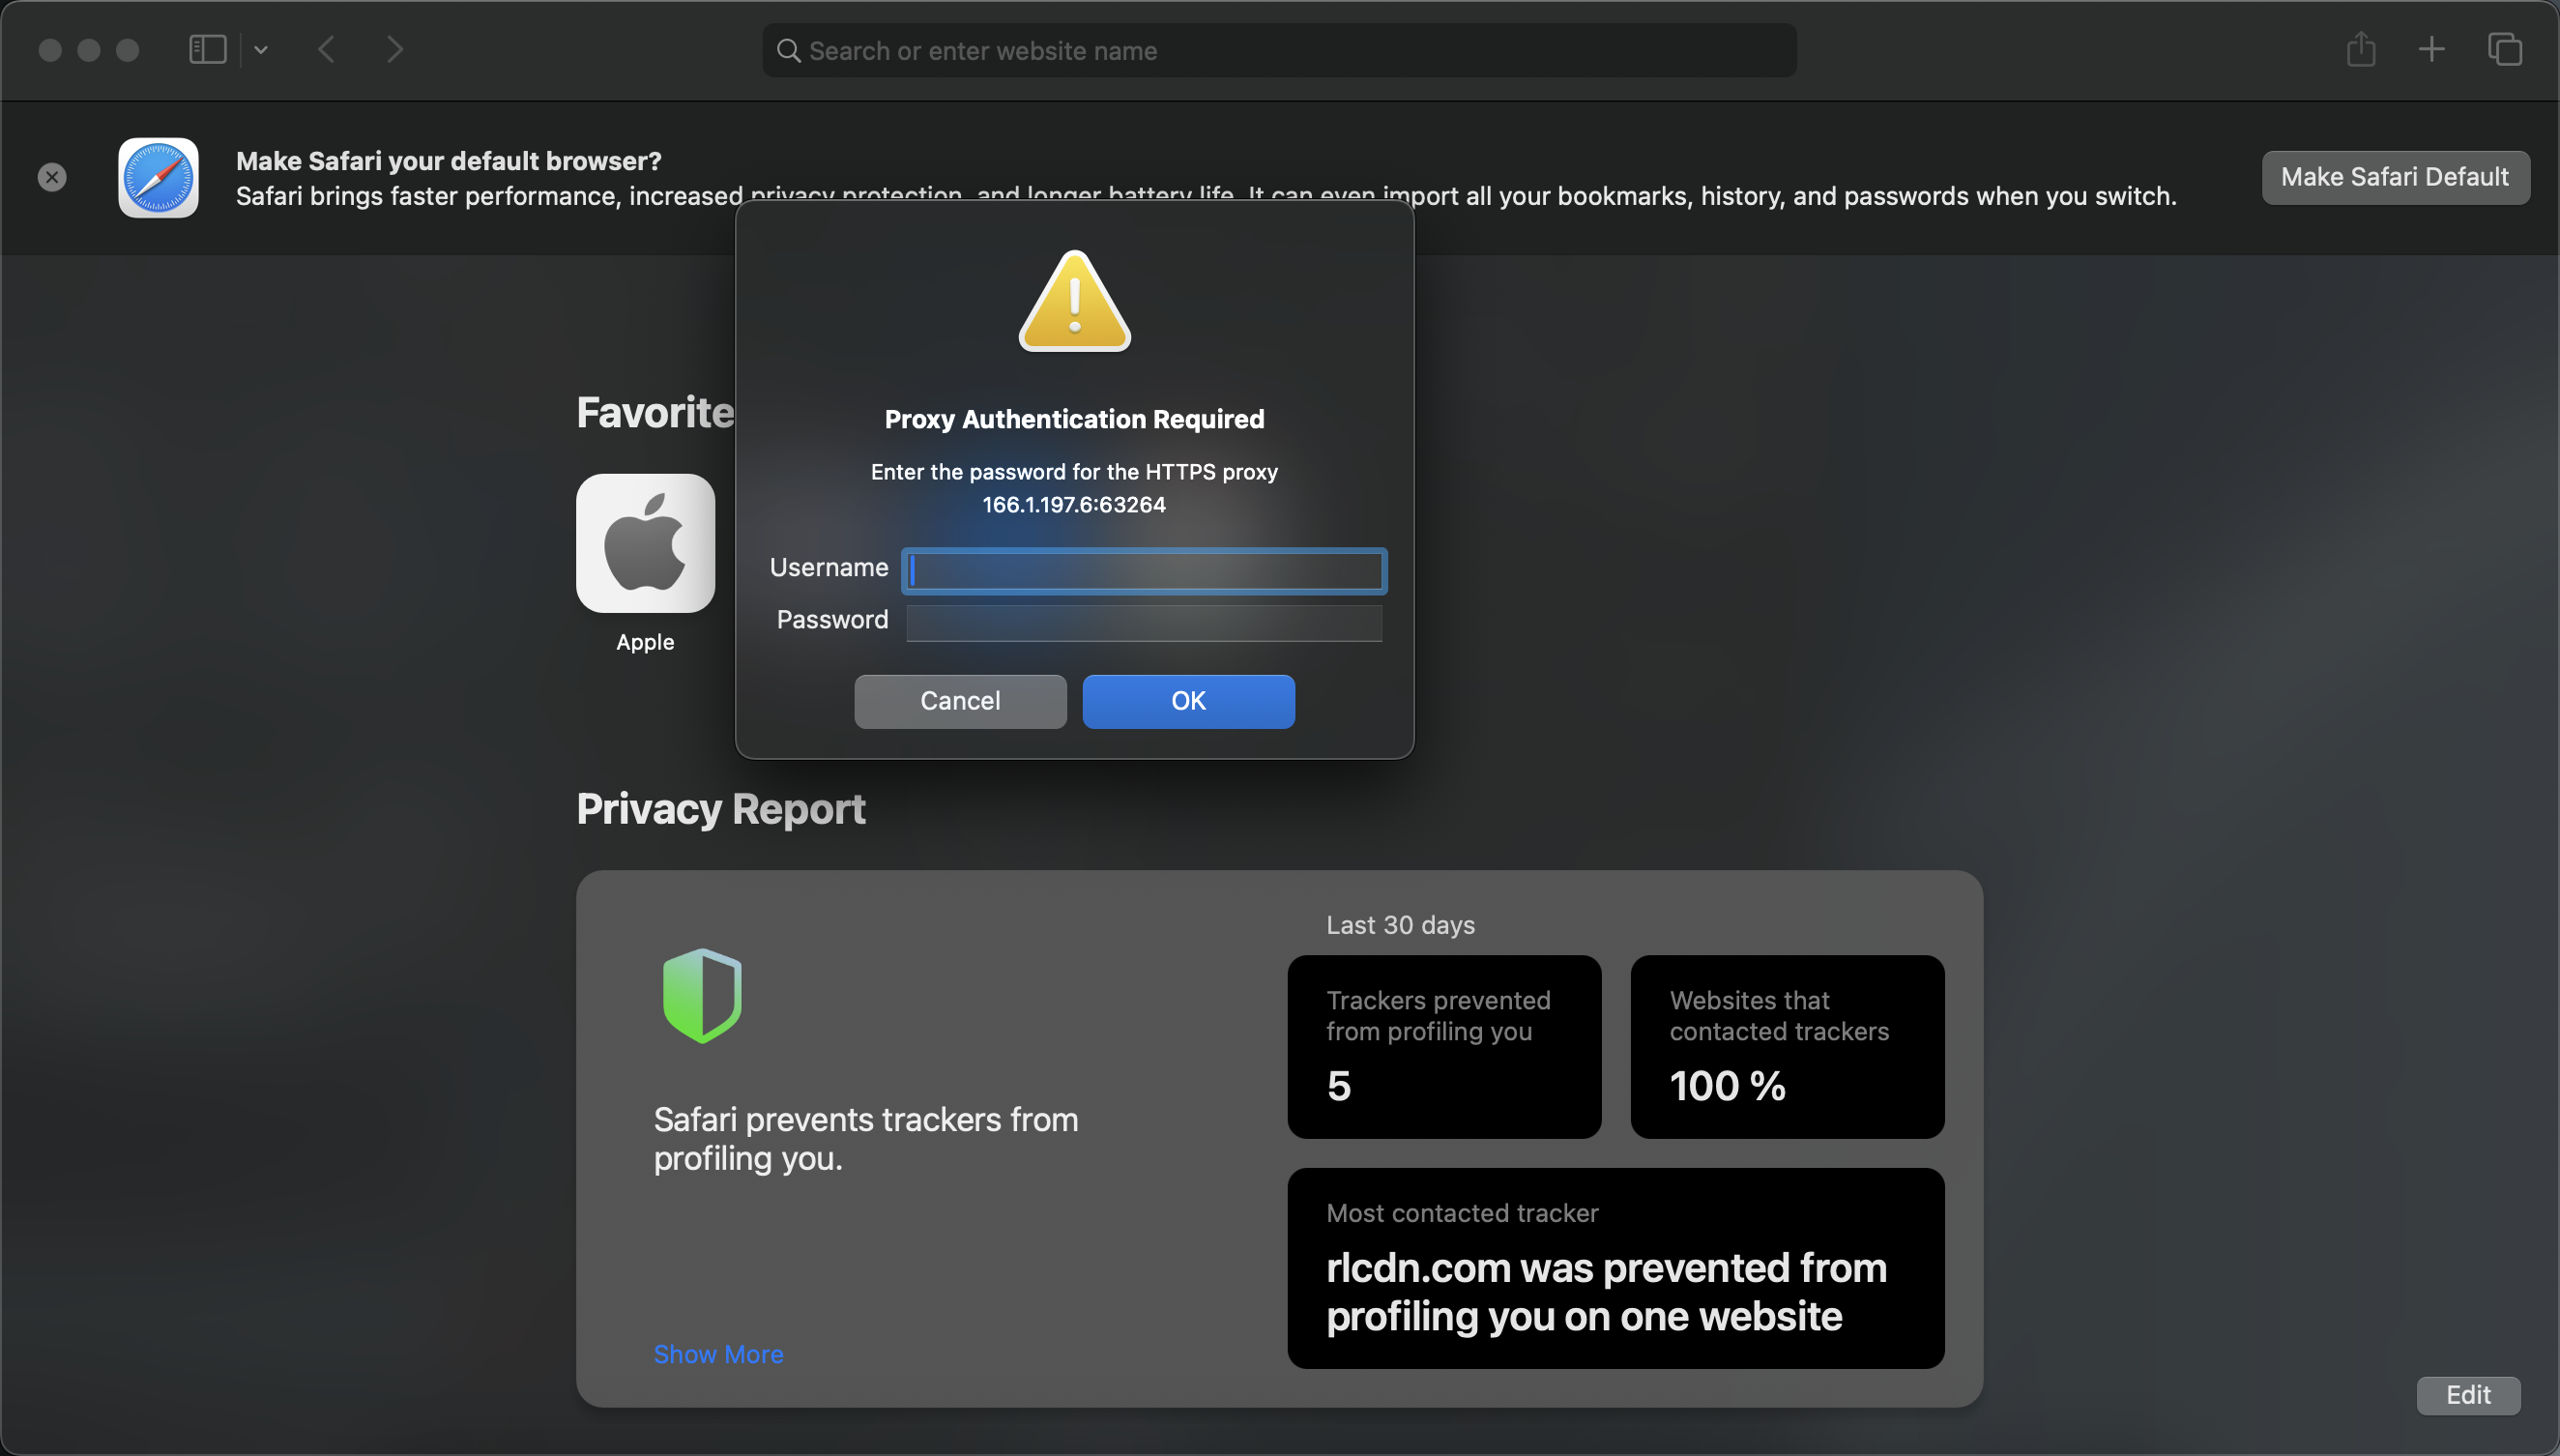
If everything is done correctly, you will see your IP address has changed.

Not all apps use the system proxy settings in macOS. For example, in Google Chrome, the IP address remained unchanged. Be careful and check the proxy operation in each application separately.
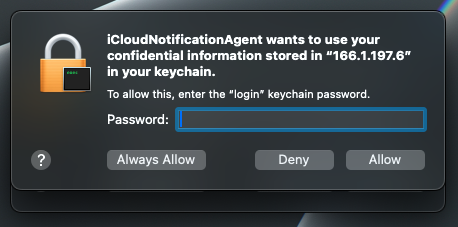
Keychain Issue
I encountered a problem: after enabling the proxy server in macOS settings, endless Keychain prompts started appearing: “%appname% wants to use your confidential information stored in ‘proxy IP address’ in your keychain. To allow this, enter the ’login’ keychain password.” After searching online, I found solutions related to resetting keys in Keychain, but I didn’t try them in practice since it wasn’t my MacBook 🙁.
Frequently Asked Questions
What proxies are supported by macOS?
macOS works with HTTP, HTTPS, and SOCKS proxies (IPv4). Any type is supported (server, mobile, residential).
Where can I get a proxy for macOS?
- Find free proxy lists on Google. Some sites post free proxies to profit from traffic. I do not recommend this option, as attackers could access your data sent through the device.
- Buy a proxy. This way, you can select the country, proxy type, rental period, traffic volume, and be sure about your connection’s security.
- Set up your own proxy server. This option is suitable if you have your own server (at home or work) and want to proxy your traffic through it.
Which macOS versions support proxies?
All modern versions of macOS support proxies. Starting from version 13, the settings interface changed, so this guide is relevant for version 13 and above.
How can I check which proxy server is set in macOS?
You can view this in the proxy settings: “System Settings” – “Wi-Fi or Networks” – “Details” next to the connected network – “Proxies”.
Why do you need a proxy in macOS?
- To access websites and services restricted in your region;
- Anonymity and data protection — hiding your real IP address;
- Changing your geolocation — access content unavailable in your region;
- In some cases, proxies are used for ad blocking and saving traffic.
What’s the difference between HTTP, HTTPS, and SOCKS proxies?
- HTTP proxy: If the connection is not secured (regular HTTP, not HTTPS), your ISP can see all your traffic—what sites you visit, what data you send, and what content you load. If you use an HTTP proxy for HTTPS sites (via the CONNECT method), your ISP sees only the site name (SNI) and the fact of connection, but not the contents (unless the proxy intercepts and decrypts the traffic). The proxy server owner can see all HTTP traffic, including addresses, requests, and responses. For HTTPS via HTTP proxy, they see only the site address, not the contents (unless MITM).
- HTTPS proxy: Same as HTTP proxy, but the connection between client and proxy is protected with TLS/SSL. The ISP sees you connect to the proxy (IP and port), but cannot see any content—even between you and the proxy (traffic is encrypted). After the proxy—if you access an HTTP site, the proxy owner sees everything; your ISP does not.
- SOCKS proxy (most often SOCKS5): Acts as a universal tunneling protocol at the transport level. It simply relays “raw” data between you and the remote server. Your ISP sees that you’re connected to a proxy but doesn’t see where the traffic goes if your app uses an encrypted protocol (like HTTPS over SOCKS). If the data is NOT encrypted (like regular HTTP over SOCKS), then the traffic may be visible to the proxy owner, but not to your ISP. The proxy server owner can see everything passing through if it’s unencrypted. If you use HTTPS, only the site name is visible, as in other cases.
- SOCKS is not always a “VPN”: SOCKS does not encrypt traffic itself; it is just a tunnel.
- HTTPS proxy ≠ VPN: This is only encryption between you and the proxy, not between you and the end site.
- Your ISP always sees the connection to the proxy (IP address and port), but not necessarily the content if encryption is used.
What’s the difference between a proxy and a VPN?
VPNs work at the OS level and redirect all traffic through the VPN, while proxy servers operate at the application level and redirect only the traffic of a specific app or browser.
Can you manage specific proxy settings for each app in macOS?
Yes, the easiest way is to use Proxifier (or similar). It lets you create a list of profiles, with a set of rules for each app in the system.
Possible Issues
- After entering proxy data, nothing loads — check if the proxy settings are correct and watch for the Keychain prompt.
- Incorrect proxy username or password — double-check your proxy settings.